Showing posts with label pak choi. Show all posts

Monday, 27 May 2013

Orient Express - fast-growing veg from the Far East


A friend was musing that children these days learn to use chopsticks before they learn to tie their shoelaces. It’s true: a Chinese takeaway, sushi snacks, eating at Yo Sushi or Wagamama all give them the opportunity to practise their chopstick skills while shoes for the under 10s do all seem to do up with Velcro.

But if kids are all savvy enough to know their bok choy from their mustard greens in a Chinese restaurant or in the supermarket, there is still comparatively little being grown in our gardens. In many parts of China, Korea and Japan the climate is comparable to ours, so there’s no reason why we shouldn’t be raising our own oriental vegetables. Most supermarket pak choi, for instance, does come from the UK, but you still don’t see it being grown very often in the vegetable patch. We seem to prefer to stick to lettuce and the more traditional kind of cabbage. Which is a shame because these Eastern brassicas are fantastically rewarding crops to grow:
  • They’re quick. At this time of year they’ll germinate in three days and be ready to eat in a month.
  • They’re unfussy: you can sow and grow oriental greens just about any time of year. In fact they grow better from midsummer onwards as the days get shorter. If you have a polytunnel or a greenhouse you can keep them going overwinter – most are reasonably hardy.
  • They’re versatile. You can harvest oriental leaves at just about every stage of growth. As microleaves for a garnish after about two weeks. As cut and come again leaves in a salad or in a stir fry. As a vegetable in their own right when the whole plant is cut. The younger the plant when you harvest it, the more delicate the flavour.
  • They’ll grow anywhere. In the open ground, if you have it. In pots, in troughs, on windowsills, or patios. They don't need a vast amount of space.
At our Secret Garden Club afternoon discussing oriental vegetables, we showed leafy greens being grown a microleaves, in pots and troughs, and out in the open ground in the garden. By successional sowing, that is, sowing little and often, we can have leaves available for crunchy salads pretty much 365 days a year.

Types to try:
Mizuna
Mizuna is a brassica with bright green serrated leaves. It’s often used in salads, where it adds a slightly chewy texture and a bit of bite. I actually think a little mizuna in a salad goes a long way; I prefer to eat it either as microleaves, or as a whole plant, pak choi style, in a stir fry.
It’s easy to see why mizuna is popular though: it’s probably the easiest salad vegetable to grow anywhere. It will grow in most soils, at most temperatures. It’s hardy and vigorous.

Mustard
Also known as red mustard, red giant mustard, Chinese red mustard, mustard green or several other names. This is a pungent, peppery-hot leaf, oval-shaped with a serrated edge and coloured green streaked with purple. You may have also heard of Green in Snow, a lovely name, I think, for a particularly pungent mustard leaf.

Pak choi
If you look on the package label, you’ll see that nearly all pak choi sold in supermarkets is grown here in the UK. Pak choi grows exceptionally well: like mizuna, any time of year will do, though if you’re sowing in winter, a greenhouse or polytunnel will be needed or growth will be very slow.

The only drawback to pak choi is that I think it is the slug and snail’s favourite food. Well, possibly second favourite to hostas. Wherever you grow them they will need slug protection – we tend to use copper rings around each plant in the open ground, or copper tape around the rim of a pot.

Choy sum
Related to pak choi but with slimmer leaves and – I think – a less distinctive taste.

Morning glory
Also known as water spinach, this is an edible variety, Ipomoea aquatica, from the Ipomoea family, which also includes sweet potatoes (Ipomoea batatas). Common bindweed is also a  relative. There are edible and non-edible morning glory varieties. As the alternative name water spinach suggests, it likes to grow near water, and can become quite invasive – there are controls over the growth of morning glory in many US states for instance.

Chinese broccoli, kailans
If I had to pick a favourite from this list, it would be kailans (left). This is a type of broccoli where the stem is the interesting bit and a floret a bit of an afterthought. The stem is crunchy, and has a nutty, mustardy taste. You can also eat the leaves.

Grow kailans in rich soil, with lots of organic matter. The plants will grow quite big and may need support. When you cut the main stem to eat, it will grow again, so that in a season you will get 3-4 cuttings from one plant.

They are not quite so prey to slugs and snails as pak choi, above, but we still take precautions. I’d be much more upset about losing a Chinese broccoli plant to a slug attack than I would a pak choi or two.

Chinese cabbage
The Chinese cabbage you buy in the shops is only one type; there are plenty others, such as Tatsoi,which grows as a low rosette of dark green leaves rather than the firm-headed, pale yellow-green variety we’re all familiar with.

Komatsuna
Dark green fleshy leaves, ideal for making a salad seem substantial, also good in stir fries. Another easy one to grow, unfussy about soil and temperature.

Perilla (shiso)
This is a leaf more associated with Japan: you frequently find this heart-shaped, frilled-edged leaves garnishing sushi – or quite often, a plastic imitation shiso leaf in the bottom of your pre-packaged sushi.

Shiso leaves can be green (we have a couple of green plants here) or red. They have a slightly chewy texture and faintly minty taste.

Let’s look in detail at how you might grow these greens in a variety of ways.

Growing in the open ground
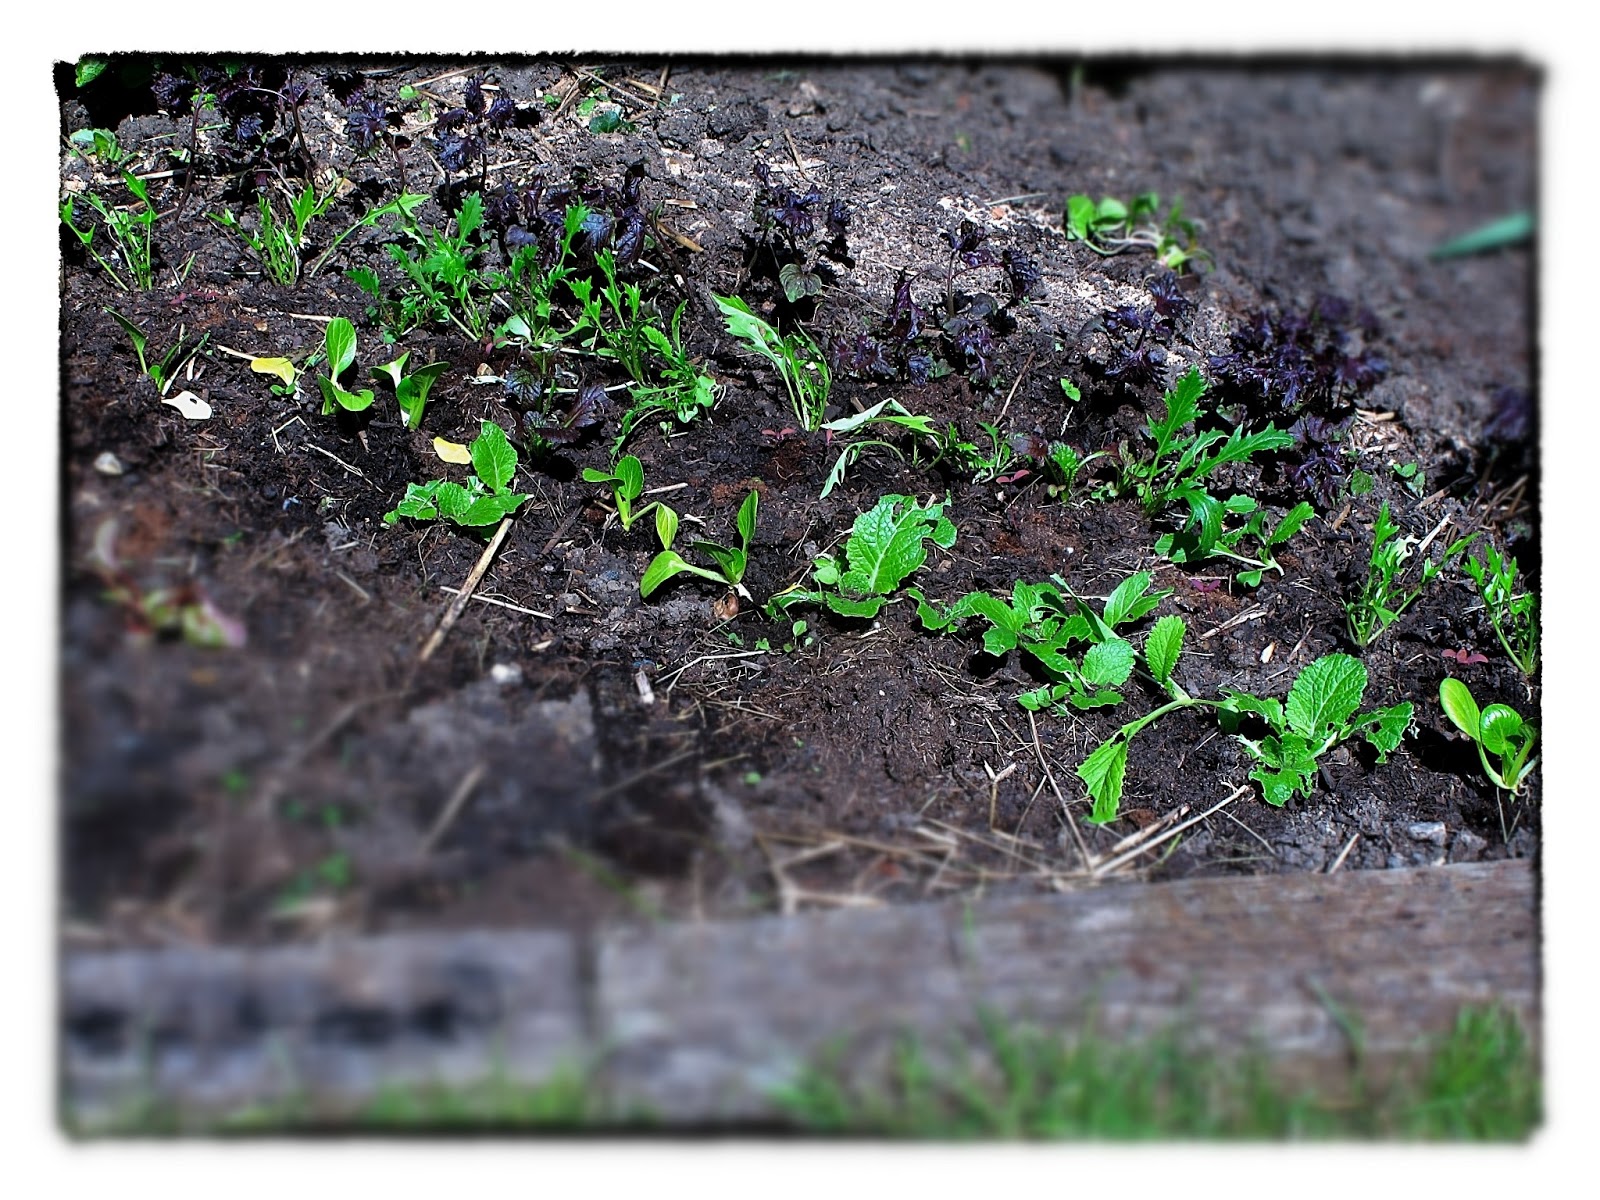
Although our oriental veg will grow very happily out in the vegetable bed, not all varieties want to start there. Mizuna, mustard, komatsuna and tatsoi will all germinate and grow very readily if sown direct into the spot where they are to grow. Kailans will do in theory but I have always found it easier to start kailans in modules and then transplant them when the weather warms up. The same with shiso.

It’s worth taking the time to prepare your ground. Weed it, remove stones, dig in compost, organic matter, or manure if you have it. Think of it as making a nice soft bed for them to grow in.

Sow as thinly as possible: you will only have to thin out seedlings later if you don’t … though when you do thin them, don’t forget to wash and/or trim the thinnings and add them to a salad as well. The other way to do it is to station-sow: make a little hole every four inches or so, drop one seed down that hole and fill, thus determining exactly where each plant is to grow.

Remember your slug protection before the seedlings germinate, or you may never see them at all. When the seedlings are tiny, they will need watering until the plants are established.
If the soil is nutrient-rich you shouldn’t have to feed the plants – you’ll be picking them before too long. If you think they would benefit from a feed, choose a nitrogen rich solution: nitrogen promotes leafy growth, and good leafy growth is what you want from these particular vegetables.

Growing in a pot
There are advantages to growing in a pot. Slug and snail control is easier: you can move the pot away from the pests, or run copper tape around the rim of the pot. You can control the growing environment: the temperature, the exposure to wind, how much water they get, and so on.

If you’re growing in order to pick cut-and-come-again leaves rather than whole plants, I’d say a pot is probably the best way to do it. It’s only when you think of growing a full-size plant – pak choi, says – and you realise you’ll need a very big pot to accommodate the plants and all their roots.

My solution here is to grow in a trough rather than a pot. More convenient for windowsills, anyway, and it seems to give the individual plants more room.

You can either sow your seeds in the pot directly, for salad leaves, or sow seeds in modules and transfer the plants. From March to September, the pot will be happy outside. In March, it might need some protection at night: put some horticultural fleece, or drape some bubble wrap or fit a clear plastic lid over the pot. Although many of the plants named here are hardy, they won’t grow fast in the cold.

In autumn and winter, move your pot into a polytunnel, greenhouse, or inside altogether. I have successfully raised pak choi indoors overwinter, although it does take much longer to grow. It’s not so much the cold that bothers them, as they can stay nice and warm indoors, it’s the low light levels of winter.

If your pots are indoors, you shouldn’t have to worry about slugs, snails or flea beetles. Look out for aphids, though, especially when it warms up in spring. They can get everywhere.

Dealing with pests
Most of these oriental vegetables are brassicas. That means they are vulnerable to the usual cabbage pests: cabbage white butterflies, whitefly, and also disorders such as clubroot. 

However, here’s another thing in the oriental veg’s favour: they tend not to be in the ground for long enough to be too bothered by these pests. By the time the pest finds them, you’ll be picking them.

They’re not entirely pest-free though. You’ll see we’ve had slug damage on the Chinese cabbages. Or maybe it’s snail damage, since we’ve been using biological controls to get rid of our slugs. If you’re growing in a pot or trough, then a line of copper tape along the rim of the pot should keep both slugs and snails away. In the open ground it’s a bit more tricky. We’ve put copper rings round the bigger plants, and we don’t really want to use pellets. If you don’t want to go down the admittedly expensive route of biological control (but then we did have a lot of slugs), try surrounding the plants with crushed eggshells, grit, or set beer traps.

Mizuna and mustard, particularly, also get eaten by flea beetles. You can tell flea beetle damage by the tiny perfectly circular holes in the leaf.  We’re lucky here in the Secret Garden in that we’re not really affected by flea beetles, but there's not much you can do about them except be thankful that the damage isn't usually bad enough to seriously reduce your crop. Some people recommend trying to catch the beetles by holding sticky tape under the plant so that when the beetles jump, they land on the tape, sticky side up, and get stuck. I'd say it's quite fun to watch people trying out this technique but it rarely seems to be very effective.

The very young seedlings are also attractive to aphids. These can usually be wiped off, or you can use a garlic solution spray to deter them.


Tuesday, 4 September 2012

Last chance to sow

At this time of year, when you are harvesting in earnest, you might wonder if you can put your now-empty beds to some use. With the summer vegetables being harvested and winter vegetables on their way to maturity you might think there's not  much you can start off right now. But actually there's plenty that can be sown at the end of summer and on into the autumn.

We filled up a number of empty spaces in The Secret Garden Club's beds with some late summer seeds. Some quick-growing varieties can be started off now to give you a crop before the winter sets in, weather permitting. Some crops need to be started off in the autumn to give them their best chance of developing well in the new year, so it's as well to remember to get them going. We also looked at how to raise a crop of new potatoes to be eaten on Christmas Day. 

So, we'll start with some fast-growing veg which you can sow now in order to harvest and eat later on in the autumn. Typically these will be final sowings of summer crops. 

Oriental leaves
Back in July salads were the main topic for the Secret Garden Club. We looked at how salad vegetables can be grown throughout the year if you take the trouble to protect them in the winter months.
Your best bet for salads at this time is for cut-and-come-again leaves. Here you don't let the seedlings develop into full-grown lettuces, but pick them a leaf at a time when you want a salad garnish. The seeds germinate quickly and you can grow a number of different varieties. Not just lettuce, but oriental veg such as pak choi, tatsoi, mustard leaves and mizuna.

At this time of year and into October, you can sow your seeds directly into the open ground. They'll germinate in about a week (mizuna almost certainly sooner) and you can start picking leaves in about a month. Keep them well watered - not a problem this summer - as a dry spell will check their growth and they will run to seed. Come October, the nights may well be getting cooler and you might want to throw some horticultural fleece over them to insulate them from the cold.


Alternatively you can grow salads in containers, so that you can bring them indoors or under cover at the first sign of cold weather. We've got three different types of container all happily growing salad.

The fruit crate is one of our favourite containers for growing salads and other fast-growing vegetables. This mixed salad crate was sown in August out here on the terrace. The trough of lamb's lettuce was sown in July and has been kept indoors - lamb's lettuce can be erratic when it comes to germination and so I'll always sown them under cover if I can. The small pots, also sown in July, have been raised in a patio greenhouse - these have a mixture of oriental leaves and give me a regular supply of interesting, spicy leaves for garnish.

These also have the advantage of germinating quicker, which is something you might well want to take into account at this time of year. Once the seedlings are growing well, you can move them outside to save on your indoor space.

Outdoors, of course, you can grow in greater quantities, and aside from possibly protecting against the cold, they need less cossetting than indoor plants.

As autumn wears on, you can continue to sow salad. By mid-October, I'd start them all off indoors using containers, and find the sunniest, lightest spot in the house to germinate the seedlings. Germination and subsequent growth will be much slower as the days get shorter.

Pak choi
You can continue to sow pak choi in September. If it looks like staying warm and damp, try sowing seed outdoors, but for more reliable germination, I would either sow in modules indoors and then transfer the seedlings outdoors in October time, or go back to our trusty fruit crate.

This is a good depth for growing fast-maturing veg like pak choi and evenly spaced, will give you around 12 plants. You can either treat them as cut-and-come-again leaves or let each plant develop a heart to harvest as mature pak choi.

One thing that puts people off growing pak choi is that it’s a bit of  a pest-magnet. It attracts slugs, flea beetles and pigeons for starters, all wanting some of those succulent leaves.

Pigeons can be deterred by growing them under a net; pigeons and flea beetle will be kept off if you grow under cover. To keep the slugs out, you can use tried and tested methods such as beer traps, night raids, even slug pellets, although there are many good reasons not to use pellets, mainly to do with contamination and the risk of something else, like a bird, or even a cat or dog, eating the pellet by mistake and being harmed by it.

The slug and snail deterrent I use for all my crops which are vulnerable – brassicas, courgette and pumpkin seedlings, sunflowers and globe artichokes – is to grow the seedling inside a copper ring, or collar. Slugs and snails don’t like travelling over copper – it sets off a reaction in their mucus, like giving them a little electric shock.

Now you can buy ready-made rings out of copper, but they are quite expensive. Copper tape isn’t exactly cheap either – 4 metres will typically cost about £7 – but it will stretch a lot further and you can make your own collars using cut-up water bottles.

They are re-usable – I have some home-made collars that are about five years old now and even when the copper dulls to a brown colour it’s still effective. Note though that you aren’t killing the slugs and snails, just keeping them off particular plants.

This may be a good thing, if you don’t like the idea of killing them, or a bad thing, if you want to exercise some population control. If the latter, then my recommendation is to invest in some nematodes come spring.

Pop the collars carefully over the seedlings when they emerge, or when you plant them out. Be careful, especially in the open ground, not to place the ring over a slug or snail that’s already in residence. Then you will trap the slug inside the ring, not outside.

Peas

You can sow peas in autumn in order to get an extra early crop the next spring. The idea here is to sow now, so that you can be picking your first peas of the year next May. Then you start sowing again in March to harvest from June, giving you a constant supply of peas from May through to August.

Your chances will be improved if you use different varieties at different times. Meteor or Kelvedon Wonder are known is known as first early pea which will be the first to mature, so a good choice for autumn sowing.  Id recommend a sugar snap pea for ripening in early summer June and July as they taste so deliciously sweet, especially so when they ripen in sun and warmth.

Peas can be sown directly into the ground, usually in the shape of the five-spot on a dice. However many people find that germination can be poor. Hungry mice usually get the blame for this they like nothing better than nibbling at peas. You should always keep peas for sowing safely away from mice I had a sealed packet of peas last winter which I kept in my storage chest. Retrieved them in the spring to find a neat hole nibbled out of one corner and all the peas gone.

The solution that Ive used successfully for years is to start peas off in half-guttering. Like this:

I sow the peas in a double row, about four inches apart. Keep them nice and warm and moist and away from mice. Up high in a greenhouse or a garage is good, somewhere light and frost-free.

Let the pea seedling grow to about 3-inches high before planting out, so that theyve developed a good root system.

Then dig out a shallow trench in your vegetable bed, give the peas a really good soaking and using a trowel you should be able to slide them out, all in one piece, into the trench in the open ground. Now firm the soil around the seedlings, and water again. They will need some sticks or mesh to climb up you can put this in before or after transplanting.

There are a number of reasons for using the guttering:

  • Its shallow, so it doesnt use so much compost = economical;
  • Because its shallow, its easier to slide out the seedlings in one piece. The long smooth semi-circular shape fits neatly into a shallow trench as well. You dont need to dig out and then in again;
  • This is important because pea seedlings dont really like to be disturbed and are easily flattened;
  • The seedlings get a good head start before the pea weevils start eating U-shaped notches in the leaves.

In fact Im so enamoured of these half-guttering seedbeds that I use them for beetroot - getting the seedlings going and thinned before sliding out, and also parsnips. Parsnips are notoriously inconsistent germinators and this really helps get a good parsnip crop going. The other advantage of using the guttering, which in practice works particularly well with parsnips is that the seedlings grow to a good height, entirely weed-free.

Sown in the open ground, its sometimes difficult to tell, especially with parsnips, which is a weed and which is a tiny parsnip seedling. So you leave well alone, and end up with a weedy bed not a good start for your crops.

Back to the peas ...

The peas are hardy and shouldn’t need protection from frost, but if we have a very cold winter, it will do no harm and will help them if you throw horticultural fleece over the seedlings to insulate them. Don’t expect too much in the way of growth over the winter: it’s when the weather warms up in March (maybe even February) that they will start to put on growth and be ready early.

You may well have problems with mice trying to dig the plant up to get at the seed under the soil. Try putting mesh down over the seedlings – they will happily grow through that and it should prevent the mice from being able to dig up the plant.

New potatoes for Christmas

This is a traditional way to grow new potatoes: planting them in late summer, ready to harvest on Christmas morning so that you have freshly dug new potatoes with your Christmas dinner. It sounds almost romantic, doesnt it?

The reality is slightly different, but its still a fun thing to do. Dont expect massive yields from your autumn grown spuds unless you plant dozens of them, you cant expect much more than enough potatoes for Christmas lunch. Dont expect them to grow terribly big again not a bad thing with nutty little new potatoes.

One reason to do it this year that I find quite compelling is that this has been a horrible year for potatoes too cold, too wet, at just the time they were maturing.

There are two ways you can approach this. You can either plant them in the open ground, or use the bin liner technique which were big fans of here at the Secret Garden Club.

A nice strong black binbag will do. Or a compost bag, so long as it has that black lining inside. The black lining is to keep the light out, so that the potatoes inside don’t go green.

We planted Duke Of York potatoes at Sunday's Secret Garden Club. These are early potatoes good for both boiling and roasting, depending on how you like your Christmas Day spuds.
The Duke Of York potatoes had little shoots emerging from them before we planted them. This means the  potatoes have been chitted,ie, stored in a light cool place so that the shoots develop. It’s not essential to chit potatoes but it does get them off to a head start in the ground. It also helps you when you’re planting them out as you can see where the shoots will develop and plant them the right way up.
Each compost bag will take three seed potatoes, seed potatoes being the starter which will grow into new potato plants. 
1) The first thing to do is to put about three inches of compost in the bottom of the bag, spread evenly. Make it easier for yourself by rolling the sides of the bag down so that your bag is about six inches tall. You’ll want the sides rolled down anyway after you plant the potatoes – if you keep the bags at full height your potatoes will never see the sun and they won’t grow.
2) Next you want to take a sharpened pencil or sharp stick and make some drainage holes in the bottom of your potato bag. This is very important – you do not want waterlogged potatoes.  They will rot, and they will stink while they’re doing it.
So, make about 5-6 drainage holes at the foot of each bag.
3) Now place three potatoes into the bag. Space them out evenly.
Always use seed potatoes, ie, bought from a nursery or garden centre specifically for growing. Seed potatoes should be guaranteed free from viruses, which culinary potatoes won’t be. Potatoes in the shops may have been sprayed with a shoot suppressant.
Potatoes in the shops may not have been grown in the UK and so may not be well adapted to grow here. Many, if not most, of the seed potatoes grown in the UK come from Scotland and are bred to grow well in our conditions.
4) The potatoes should go into the sack with the chits uppermost.
5) Once the potatoes are in, cover them with more compost: aim to have a layer of compost  about 2-3 inches thick over the chits.
6) Finally, water them lightly. They don’t need to be soaked. Check that water is seeping out of the drainage holes.
7) Put the potato bag outside somewhere light and somewhere reasonably sheltered.
8) After about 2-3 weeks you’ll see the dark green leaves poking up through the soil surface. Once the leaves are about 3-4 inches above the surface of the compost, add more compost to the bag, until the green tops are only just visible above the soil surface.
You’ll probably need to starting unroll the sides to accommodate the new compost as well. This is an ongoing process. Every time the plant grows so that you have about 3-4 inches of stem and leaves above the surface, unroll the sides a little more and add more compost.
If it rains a couple of times a week, you probably won’t need to water them. But do check your compost: if it’s very dry, then water it. Make sure any excess water is running out through those drainage holes. If it rains a lot and you put your hand in and the compost is sodden, move the bag under cover for a few days to let it dry out a bit.
In early December, you can put on a pair of gloves and stick your hand into the compost to make sure you have some potatoes coming, hopefully enough for dinner on Christmas Day. 
The best way to harvest the bagged potatoes is simply to up-end the bag on to a surface and pick out the spuds. Put the rest of the plant on the compost heap and spread the compost on your garden beds. 
The main advantage of growing potatoes in a container at this time of year is that potatoes are not frost-hardy, so if the weather turns very cold between now and Christmas when the plants are still young and tender, you can move them indoors/under cover. Keep them in the light, somewhere frost-free, and don't forget to water them if they are under cover. Do not overwater if they sit in the wet, they will rot.