Showing posts with label brassicas. Show all posts

Monday, 27 May 2013

Orient Express - fast-growing veg from the Far East


A friend was musing that children these days learn to use chopsticks before they learn to tie their shoelaces. It’s true: a Chinese takeaway, sushi snacks, eating at Yo Sushi or Wagamama all give them the opportunity to practise their chopstick skills while shoes for the under 10s do all seem to do up with Velcro.

But if kids are all savvy enough to know their bok choy from their mustard greens in a Chinese restaurant or in the supermarket, there is still comparatively little being grown in our gardens. In many parts of China, Korea and Japan the climate is comparable to ours, so there’s no reason why we shouldn’t be raising our own oriental vegetables. Most supermarket pak choi, for instance, does come from the UK, but you still don’t see it being grown very often in the vegetable patch. We seem to prefer to stick to lettuce and the more traditional kind of cabbage. Which is a shame because these Eastern brassicas are fantastically rewarding crops to grow:
  • They’re quick. At this time of year they’ll germinate in three days and be ready to eat in a month.
  • They’re unfussy: you can sow and grow oriental greens just about any time of year. In fact they grow better from midsummer onwards as the days get shorter. If you have a polytunnel or a greenhouse you can keep them going overwinter – most are reasonably hardy.
  • They’re versatile. You can harvest oriental leaves at just about every stage of growth. As microleaves for a garnish after about two weeks. As cut and come again leaves in a salad or in a stir fry. As a vegetable in their own right when the whole plant is cut. The younger the plant when you harvest it, the more delicate the flavour.
  • They’ll grow anywhere. In the open ground, if you have it. In pots, in troughs, on windowsills, or patios. They don't need a vast amount of space.
At our Secret Garden Club afternoon discussing oriental vegetables, we showed leafy greens being grown a microleaves, in pots and troughs, and out in the open ground in the garden. By successional sowing, that is, sowing little and often, we can have leaves available for crunchy salads pretty much 365 days a year.

Types to try:
Mizuna
Mizuna is a brassica with bright green serrated leaves. It’s often used in salads, where it adds a slightly chewy texture and a bit of bite. I actually think a little mizuna in a salad goes a long way; I prefer to eat it either as microleaves, or as a whole plant, pak choi style, in a stir fry.
It’s easy to see why mizuna is popular though: it’s probably the easiest salad vegetable to grow anywhere. It will grow in most soils, at most temperatures. It’s hardy and vigorous.

Mustard
Also known as red mustard, red giant mustard, Chinese red mustard, mustard green or several other names. This is a pungent, peppery-hot leaf, oval-shaped with a serrated edge and coloured green streaked with purple. You may have also heard of Green in Snow, a lovely name, I think, for a particularly pungent mustard leaf.

Pak choi
If you look on the package label, you’ll see that nearly all pak choi sold in supermarkets is grown here in the UK. Pak choi grows exceptionally well: like mizuna, any time of year will do, though if you’re sowing in winter, a greenhouse or polytunnel will be needed or growth will be very slow.

The only drawback to pak choi is that I think it is the slug and snail’s favourite food. Well, possibly second favourite to hostas. Wherever you grow them they will need slug protection – we tend to use copper rings around each plant in the open ground, or copper tape around the rim of a pot.

Choy sum
Related to pak choi but with slimmer leaves and – I think – a less distinctive taste.

Morning glory
Also known as water spinach, this is an edible variety, Ipomoea aquatica, from the Ipomoea family, which also includes sweet potatoes (Ipomoea batatas). Common bindweed is also a  relative. There are edible and non-edible morning glory varieties. As the alternative name water spinach suggests, it likes to grow near water, and can become quite invasive – there are controls over the growth of morning glory in many US states for instance.

Chinese broccoli, kailans
If I had to pick a favourite from this list, it would be kailans (left). This is a type of broccoli where the stem is the interesting bit and a floret a bit of an afterthought. The stem is crunchy, and has a nutty, mustardy taste. You can also eat the leaves.

Grow kailans in rich soil, with lots of organic matter. The plants will grow quite big and may need support. When you cut the main stem to eat, it will grow again, so that in a season you will get 3-4 cuttings from one plant.

They are not quite so prey to slugs and snails as pak choi, above, but we still take precautions. I’d be much more upset about losing a Chinese broccoli plant to a slug attack than I would a pak choi or two.

Chinese cabbage
The Chinese cabbage you buy in the shops is only one type; there are plenty others, such as Tatsoi,which grows as a low rosette of dark green leaves rather than the firm-headed, pale yellow-green variety we’re all familiar with.

Komatsuna
Dark green fleshy leaves, ideal for making a salad seem substantial, also good in stir fries. Another easy one to grow, unfussy about soil and temperature.

Perilla (shiso)
This is a leaf more associated with Japan: you frequently find this heart-shaped, frilled-edged leaves garnishing sushi – or quite often, a plastic imitation shiso leaf in the bottom of your pre-packaged sushi.

Shiso leaves can be green (we have a couple of green plants here) or red. They have a slightly chewy texture and faintly minty taste.

Let’s look in detail at how you might grow these greens in a variety of ways.

Growing in the open ground
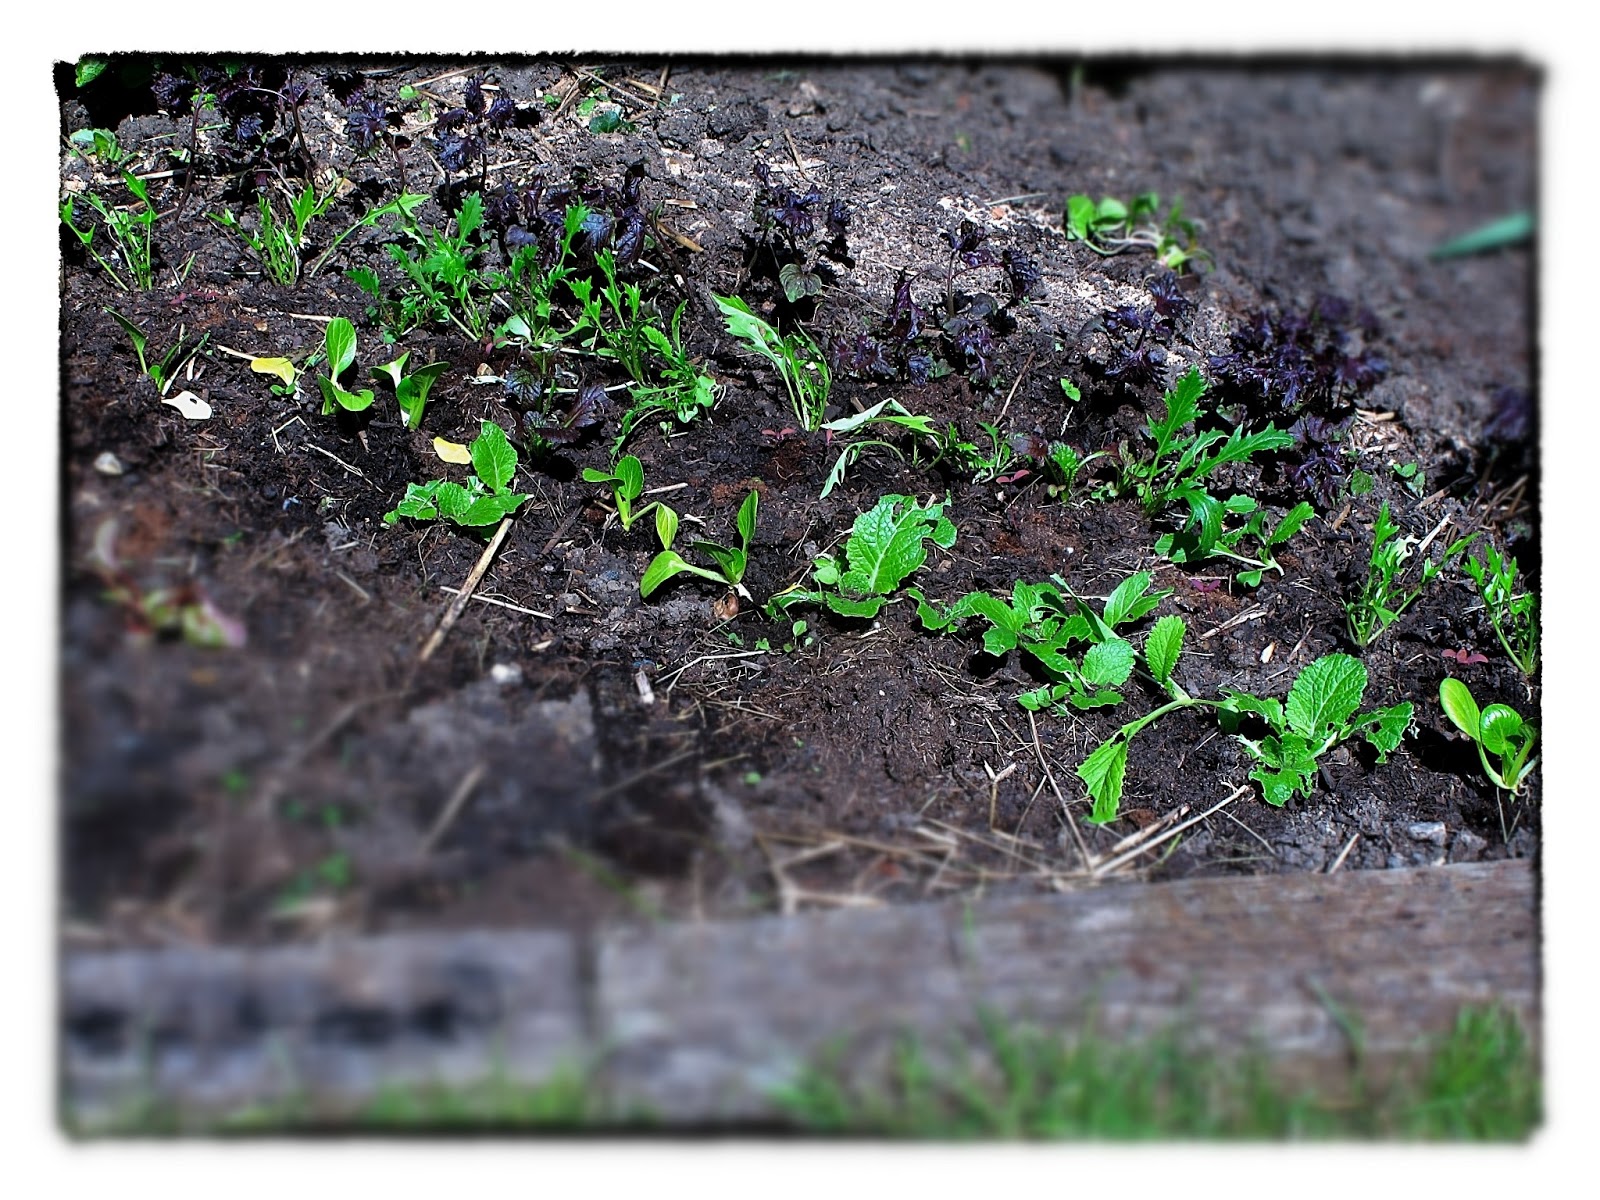
Although our oriental veg will grow very happily out in the vegetable bed, not all varieties want to start there. Mizuna, mustard, komatsuna and tatsoi will all germinate and grow very readily if sown direct into the spot where they are to grow. Kailans will do in theory but I have always found it easier to start kailans in modules and then transplant them when the weather warms up. The same with shiso.

It’s worth taking the time to prepare your ground. Weed it, remove stones, dig in compost, organic matter, or manure if you have it. Think of it as making a nice soft bed for them to grow in.

Sow as thinly as possible: you will only have to thin out seedlings later if you don’t … though when you do thin them, don’t forget to wash and/or trim the thinnings and add them to a salad as well. The other way to do it is to station-sow: make a little hole every four inches or so, drop one seed down that hole and fill, thus determining exactly where each plant is to grow.

Remember your slug protection before the seedlings germinate, or you may never see them at all. When the seedlings are tiny, they will need watering until the plants are established.
If the soil is nutrient-rich you shouldn’t have to feed the plants – you’ll be picking them before too long. If you think they would benefit from a feed, choose a nitrogen rich solution: nitrogen promotes leafy growth, and good leafy growth is what you want from these particular vegetables.

Growing in a pot
There are advantages to growing in a pot. Slug and snail control is easier: you can move the pot away from the pests, or run copper tape around the rim of the pot. You can control the growing environment: the temperature, the exposure to wind, how much water they get, and so on.

If you’re growing in order to pick cut-and-come-again leaves rather than whole plants, I’d say a pot is probably the best way to do it. It’s only when you think of growing a full-size plant – pak choi, says – and you realise you’ll need a very big pot to accommodate the plants and all their roots.

My solution here is to grow in a trough rather than a pot. More convenient for windowsills, anyway, and it seems to give the individual plants more room.

You can either sow your seeds in the pot directly, for salad leaves, or sow seeds in modules and transfer the plants. From March to September, the pot will be happy outside. In March, it might need some protection at night: put some horticultural fleece, or drape some bubble wrap or fit a clear plastic lid over the pot. Although many of the plants named here are hardy, they won’t grow fast in the cold.

In autumn and winter, move your pot into a polytunnel, greenhouse, or inside altogether. I have successfully raised pak choi indoors overwinter, although it does take much longer to grow. It’s not so much the cold that bothers them, as they can stay nice and warm indoors, it’s the low light levels of winter.

If your pots are indoors, you shouldn’t have to worry about slugs, snails or flea beetles. Look out for aphids, though, especially when it warms up in spring. They can get everywhere.

Dealing with pests
Most of these oriental vegetables are brassicas. That means they are vulnerable to the usual cabbage pests: cabbage white butterflies, whitefly, and also disorders such as clubroot. 

However, here’s another thing in the oriental veg’s favour: they tend not to be in the ground for long enough to be too bothered by these pests. By the time the pest finds them, you’ll be picking them.

They’re not entirely pest-free though. You’ll see we’ve had slug damage on the Chinese cabbages. Or maybe it’s snail damage, since we’ve been using biological controls to get rid of our slugs. If you’re growing in a pot or trough, then a line of copper tape along the rim of the pot should keep both slugs and snails away. In the open ground it’s a bit more tricky. We’ve put copper rings round the bigger plants, and we don’t really want to use pellets. If you don’t want to go down the admittedly expensive route of biological control (but then we did have a lot of slugs), try surrounding the plants with crushed eggshells, grit, or set beer traps.

Mizuna and mustard, particularly, also get eaten by flea beetles. You can tell flea beetle damage by the tiny perfectly circular holes in the leaf.  We’re lucky here in the Secret Garden in that we’re not really affected by flea beetles, but there's not much you can do about them except be thankful that the damage isn't usually bad enough to seriously reduce your crop. Some people recommend trying to catch the beetles by holding sticky tape under the plant so that when the beetles jump, they land on the tape, sticky side up, and get stuck. I'd say it's quite fun to watch people trying out this technique but it rarely seems to be very effective.

The very young seedlings are also attractive to aphids. These can usually be wiped off, or you can use a garlic solution spray to deter them.


Tuesday, 29 May 2012

The Three Sisters and other companion planting ideas

At the Secret Garden Club last Sunday we looked at different types of companion planting – putting plants together that will help each other in some way - and how these can benefit your garden.

You can grow certain plants in close proximity to each other for various reasons:
  • Some plants will ward off pests, either by their smell, or secretions from their roots, or simply because they have sharp thorns. You can grow these plants close to those that are vulnerable from such pests in order to give them protection. 
  • Conversely you might use plants that are particularly susceptible to a pest as a 'decoy', to draw them away from another more valuable or delicate plant.
  • Some plants will attract beneficial insects, such as lacewings, hoverflies or ladybirds, to the garden. Place these close to plants which need pollinators to set fruit.
  • Some plants, notably legumes (peas and beans), will enrich the soil for other plants.
  • Tall sturdy plants can be used to provide support for other plants, such as climbers.
  • Trailing plants might act as ground cover, suppressing weeds and acting as a mulch, reducing water evaporation from the soil surface.

We discussed in some detail one very traditional companion planting method from the Americas, widely known as the Three Sisters and practised across North America from the midwest plains to Mexico from pre-Columbian times.
The Three Sisters themselves are the staple ingredients of the traditional Native American diet: corn, beans and squash. In America, the three are sown together and provide sustenance and support for each other.
The corn provides a strong upright stake for the beans to climb up, winding their stems around the main trunk of the sweetcorn. These bean plants also act as 'guy ropes' for the corn, keeping it stable in the wind.The squash plants are trained to trail around the foot of each corn/bean combo, their broad leaves shading the soil, keeping it moist and suppressing the weeds.
A further benefit of the Three Sisters scheme is the ability of the beans to nourish the soil. Peas and beans are all able to fix nitrogen from the air through their roots in the soil. As nitrogen is one of the main nutrients required by plants, especially leafy plants, this means that the soil is left enriched after the Three Sisters crops have been harvested, ready for the next year's planting. It's a highly sustainable planting scheme.


Three London Sisters
The UK climate is not the same as the American plains or the semi-tropical climate of Mexico. It’s more unpredictable, and so the Three Sisters method has to be adapted. We can’t sow each seed at the same time, as the beans will grow much faster than the corn and will overwhelm it.
So we need to start when the corn is already about 4-6 inches high.
Sweetcorn is very easy to grow from seed, or you can readily buy seedlings from garden centres. Beware sweetcorn sold with a number of plants in each pot. They dislike having their roots disturbed too much and if you are having to tease seedlings apart to separate them when you transplant them you are liable to damage the roots. Better to buy those which have a single plant in a plastic or polystyrene module, or to grow your own from seed in coir pots, one seed per pot. With coir pots, you don't have to turn the seedling out when you transplant it, you just dig a hole the same size and shape as the coir pot, drop the pot in, and firm the soil around it. No root disturbance at all.


The best beans to use for Three British Sisters are ones which you leave to dry on the plant, not runners or French beans which need regular picking. These should be sown when you plant the corn seedlings, when the soil has warmed up and all danger of frost has passed. We used the climbing borlotti beans Borlotto Lamon from Seeds of Italy at the Secret Garden Club - borlotti beans are easy to grow in the UK and are flamboyantly beautiful: bright crimson seed pods flecked with cream, which you shell to reveal creamy-pink beans flecked with crimson. With a dense floury texture and good flavour, they're a delicious and versatile bean in the kitchen too.
For the squash Sister, any squash with a trailing habit will work well. So don't use a courgette, which grows as a bush. Butternuts, spaghetti squash, Crown Prince, or a Halloween pumpkin - all these will do very well. We planted specimens of all these at the Secret Garden Club, plus a Japanese variety, Futsu Black (from The Organic Gardening Catalogue) and a sweet, dense-fleshed Italian variety, Marina di Chioggia (Seeds of Italy, again).
Squash seedlings after planting
Start squash off in small pots, either indoors or in a greenhouse. Sow two seeds to a pot and keep the pots covered until they germinate, which should only take 5-7 days. Snip out the weaker seedling before transplanting.
Once the squash plants start to spread, try to train them in a circle around the foot of the corn/bean plants. I say 'try' because squash seem to have a wanderlust and will grow three feet in the wrong direction as soon as your back is turned. Many times I have returned from two weeks holiday in August to find that the squash have run rampant in my absence.


Planting out
The Native Americans built up mounds in the soil about 45cm across and 10cm high and planted the Three Sisters in the mounds. Creating similarly-sized square or circular mounds using a mix of manure, kitchen compost and commercial compost makes sense in the UK too: all three of the Sisters are hungry plants and need lots of nutrients to get going. Giving them a specially enriched mound should get them off to a good start.
In dry areas, the Americans would traditionally make a shallow depression in the centre of each mound to hold water. We could do well to copy this in our drought-ridden, hosepipe-banned times.
The minimum viable size for a Three Sisters plot is 3.5m x 3.5m. It's a considerable space commitment, but remember you are growing three crops in the area. Less than this and the corn may not pollinate properly. Corn is wind-pollinated, which is why you should always plant corn in blocks - plant in a row and the wind may not blow in the right direction to ensure pollination.  

Plant corn in blocks to help
ensure pollination
Each circle above represents one 45cm diameter mound. The corn and bean plants will grow together on a mound; alternate mounds are left to squash which will need more space.
In the mounds shown here as yellow circles, plant four corn seedlings in a square shape. There should be at least 15cm between the plants. Then, plant four bean seeds, one between each corn seedling - you should be able to simply push the bean seed into the ground with your thumb or forefinger. Close the soil above it and firm the surface.
In the mounds shown here as orange circles, plant two squash, as far apart as possible on the mound.
Water all the seedlings well.


The beans should germinate within two weeks, by which time the corn should be about 30cm high. As the beans grow, they may need to be tied in initially to encourage them to grow up and around the corn. The squash plants may take a while to get going, but will grow rapidly when they do. They will need training to keep them to the Three Sisters growing area. 
When squash fruit begin to form, place a clean tile underneath the fruit for them to rest on to protect it from the dirt and creepy-crawlies. Once a single plant has produced three fruit, stop the growing tip - this will help the plant concentrate on growing really good-sized fruit.

Depending on the variety, the sweetcorn should be ready to harvest from late August or September. Borlotti beans and squash can be left to mature on the plant. Make sure you lift them before the first frost.
The harvested squash should be taken indoors and leave to finish ripening in dry warmth and light. During this process they may well change colour from green to orange or yellow. Stored properly, they can be stored for 4-8 months.
There’s no reason why you shouldn’t pick borlotti bean pods to cook and eat fresh. They’re delicious, especially served with a squeeze of lemon, some salt and a drizzle of olive oil. 
But leave at least some on the plants to keep for use in winter. As summer wears on into autumn, the pods will change from bright pink flecked with cream, to a brown papery husk. Pick the pods as late as possible, but before the first frost, usually in the middle of October.
Thread the pods together and hang them up somewhere airy until all the pods are completely dried out, about 2-3 weeks. Then shell the beans. They should be dry already and rattle when shaken together and clatter when dropped on the work surface. If they land with a soft thud instead, they need more drying.
Finally, put the shelled beans in a freezer bag and seal. Place in the freezer for about 48 hours. This quick freeze just ensures that if the beans were harbouring any bugs, mites or insect eggs, that they are killed off. Once out of the freezer, spread the beans out briefly on kitchen paper just to check they’re dry again, then pour into a jar with a tightly fitting lid.
Keep in a dark cool place and they will last for months – until your next bean harvest, in fact, if you haven’t eaten them all by then.

More on nitrogen fixing
Because legumes (peas and beans) fix nitrogen from the air through their roots, they nourish the soil. This means that the soil maintains its own fertility without you having to add large amounts of fertiliser.
However, they fix nitrogen for the next crop. So if you are planning to plant your legumes with a view to feeding the soil for another crop, choose something that will carry on growing after the peas or beans have finished. 
It’s also good to follow peas with something that likes nitrogen, some thing leafy, eg, brassicas, squash.
At the Secret Garden Club, we've planted cavolo nero, or black kale (or Tuscan kale) in the middle of the sugar pea wigwams. Cavolo nero is a slim-leaved version of kale, more tender than curly kale and very flavoursome. (It also makes great 'seaweed', of the type you get in Chinese restaurants!)
Once the peas have died down in July-August, we’ll leave the plants in the ground to fix nitrogen through their roots for the benefit of the cavolo nero which will carry on growing throughout the winter. 
At Sunday's workshop, guests created a smaller version of this wigwam with cavolo nero seedlings and young runner bean plants. These were planted up into 15cm pots which can be transferred into the open ground in a couple of weeks or so when the beans get too big for the pot.


Insect repellents
Carrots and onions make excellent companions in the vegetable bed. Many gardeners find that they need to protect the carrot crop from carrot fly, a dull-looking brown fly which flies low to the ground and can detect the smell of carrots from half a mile away. The female will lay her eggs in the soil close to the carrot roots, and when the larvae hatch, they start to feed on the growing carrots in the ground. When you dig up the crop, you'll find tell-tale brown streaks and tunnels boring into the carrot itself.
Grow garlic or onions around the
edge of beds to repel aphids.
However, you can protect your carrots to a certain extent by sowing them in-between alliums (garlic and onions, mainly, although you could try leeks as well for a late-growing carrot crop - leeks don't really get going until late summer). The smell of the onions is said to mask the scent of the carrots, so that the fly doesn't realise the carrots are there.
In return, the carrots are said to mask the allium scent for the onion fly, which preys on onions and also garlic and shallots.
Garlic and onions are good for repelling many different insects, including aphids. The sulphur accumulated in their roots may also act as a natural pesticide. Some people plant alliums all around the edge of their plot or patch for this reason. Of course, you need to be sure that you don’t have any of these pests inside the plot already or else you will trap them in instead of keeping them out.
Specifically, however, garlic and onions can be sown around roses or in the rose bed to help deter greenfly and blackfly. Chives are also excellent for this: their low bushy habit and mauve pom-pom flower look attractive among the roses.
Garlic can also be used directly on plants to deter aphids. Jekka McVicar of Jekka's Herb Farm recommends crushing 3-4 cloves of garlic and bringing to the boil in a litre of water. Let the garlic cool in the water and strain. This spray can be used on the leaves of the plant. I find it works best as a preventative rather than a cure.


The magic of marigolds
Marigolds are well-known for their insect repelling properties. They are especially associated with brassicas: plant marigolds around your cabbage and cauliflowers to ward off the whitefly. Furthermore, the roots exude a substance which are toxic to nematodes, including those which attack tomatoes. So plant marigolds around the tomatoes as well. 
It can be confusing to buy marigolds and to know which is which. French marigolds are actually Mexican. African marigolds are also American in origin. Pot marigolds are a different thing again.
This is where the Latin or botanical names come in handy. Tagetes is the name to look for. French marigolds are usually varieties of Tagetes patula. African marigolds are usually varieties of Tagetes erecta – and often used as food colouring.
The botanical name for pot marigold is Calendula. Extracts from Calendula are used a lot in cosmetics, and also useful for repelling insects but they don’t have the same root secretions.


Insect attractants
Having talked at length about insect-repelling plants, we also looked at growing plants for their insect-attracting qualities. Not all insects are pests - far from it. Some, such as ladybirds, hoverflies and lacewings are known as beneficial insects. 
We think of bees as being the main pollinators of plants, but hoverflies also feed on nectar and are excellent pollinators. Plants which need a pollinator, such as squash and courgettes, and fruit trees will benefit.
Hoverflies are doubly welcome in the garden because their larvae will chomp their way through massive numbers of aphids. Ladybird and lacewing larvae are also enthusiastic consumers of aphids - a very good reason to attract them to the garden. 
Plants such as achillea (yarrow), as well as borage, the poached egg plant and comfrey are good examples of plants which will attract beneficial insects, while lavender and roses are well-known for buzzing with bees during the summer.

The beauty of companion planting
Companion planting will help your garden to look attractive. It encourages you to consider a greater variety of planting, which is always good for biodiversity, and different layouts and arrangements of plants within the plot.
It helps your garden to sustain itself – with well-selected companion plants, your garden should be humming with life, not sterile and formal. 
Adopting companion planting methods should mean you can greatly reduce or eliminate any use of pesticides. It should help you to raise better crops and improve the sustainability of your soil. At the Secret Garden Club, we're aiming to create a harmonious combination of edible and ornamental plants and companion planting has found its way into the heart of that plan.


Useful links
For more about companion plants and specific plants which work well together, there is plenty of information on the following sites:
Golden Harvest Organics - plant lists and benefits of growing together.
Victoriana Nursery Gardens - the Three Sisters - growing the Three Sisters in the UK climate. We followed many of the suggestions here for the Secret Garden Club's Three Sisters plot.
Renee's Garden - US site with the story behind the Three Sisters tradition, plus Three Sisters planting diagrams.
National Vegetable Society - Good overview of companion planting principles plus plant lists.
Laura's Organics - page on attracting beneficial insects to the garden.


Happy guests at the Secret Garden Club
To find out about the Native Indian inspired food that MsMarmite served go here.