Showing posts with label radicchio. Show all posts

Wednesday, 25 September 2013

The Italian kitchen garden

A plot for vegetables is an essential part of any Italian garden, or indeed any Italian outdoor space. Next time you’re in a major Italian city, look up and you’ll see plants tumbling over the rooftops, bright yellow dots of citrus trees. Window boxes burst not just with flowers but also edibles. Out in more rural areas, everyone keeps a patch in their garden for their kitchen garden or ‘orto’.

Think of Italian vegetables and what springs to mind? Tomatoes, obviously, although as we discussed at the Secret Garden last month, tomatoes are a relatively recent introduction into Italy. Peppers, ditto. Aubergines, which originated in Asia, have been cultivated in Italy since the early Middle Ages. All of these we grow in the Secret Garden.

Tomatoes are easy to raise in the UK, not so easy to get prolific fruit from. We grow them indoors and outside, and the latter needs a warm sunny summer to get the fruit ripening properly. Italians typically grow plum tomatoes: the varieties Roma, and San Marzano, are justly famous, and beefsteak-style tomatoes such as Costoluto and Cuor di Bue.

Both hot and sweet peppers have become staples of the Italian kitchen garden. Chilli peppers are probably slightly easier to grow outside in the UK than sweet peppers which tend to do better in a greenhouse. Classic Italian varieties include the Corno Rosso ('red horns', often known as bulls' horns) which are long, indeed horn-shaped, and sweet, plus the cayenne-style 'Piccante' peppers, and Ciliegia Piccante ('spicy cherry' peppers).


Aubergines will grow well in a conservatory or greenhouse and this year made a decent fist of it outside on our sunny sheltered patio. As with tomatoes and peppers, above, the seeds should be sown indoors early in the year, February is a good time, and transplanted into large pots in mid to late spring. The fruits should be ready for picking about now, September into October.

If you look further afield, you’ll find many other vegetables and also herbs which we think of as typically Italian and which will grow well here in the UK.

Beans – Borlotti beans are an essential for us and they grow very well outside here. Fresh borlotti beans are delicious, podded, simmered and dressed with olive oil – and impossible to buy in the shops in the UK. Having said that, we do tend to dry most of our beans. Leaving them on the plant until the pods are dark charcoal-purple in colour and hard and dry to the touch, the pods are picked before the first frost and shelled. If the beans clatter on to the worktop they’re dry and ready to store. If they land with anything like a dull thud, they need more drying out, before being poured into airtight jars and stored somewhere cool and dark for the winter. 

Courgettes and squash for both winter and summer are grown all over Italy. Two of my favourite squash for eating, the dense-fleshed Berrettina Piacentina and Marina di Chioggia, are cultivated up in the north of Italy. I always think they have a flavour somewhere between sweet potato and chestnut. We start these off in pots in April, then when they're ready to plant out, we add lots of well-rotted kitchen compost to the soil - squash and courgettes are hungry and thirsty plants. Squash will scramble along the ground and take over your beds and send long shoots out across the lawn given half a chance, so we train them upwards on to trellises.

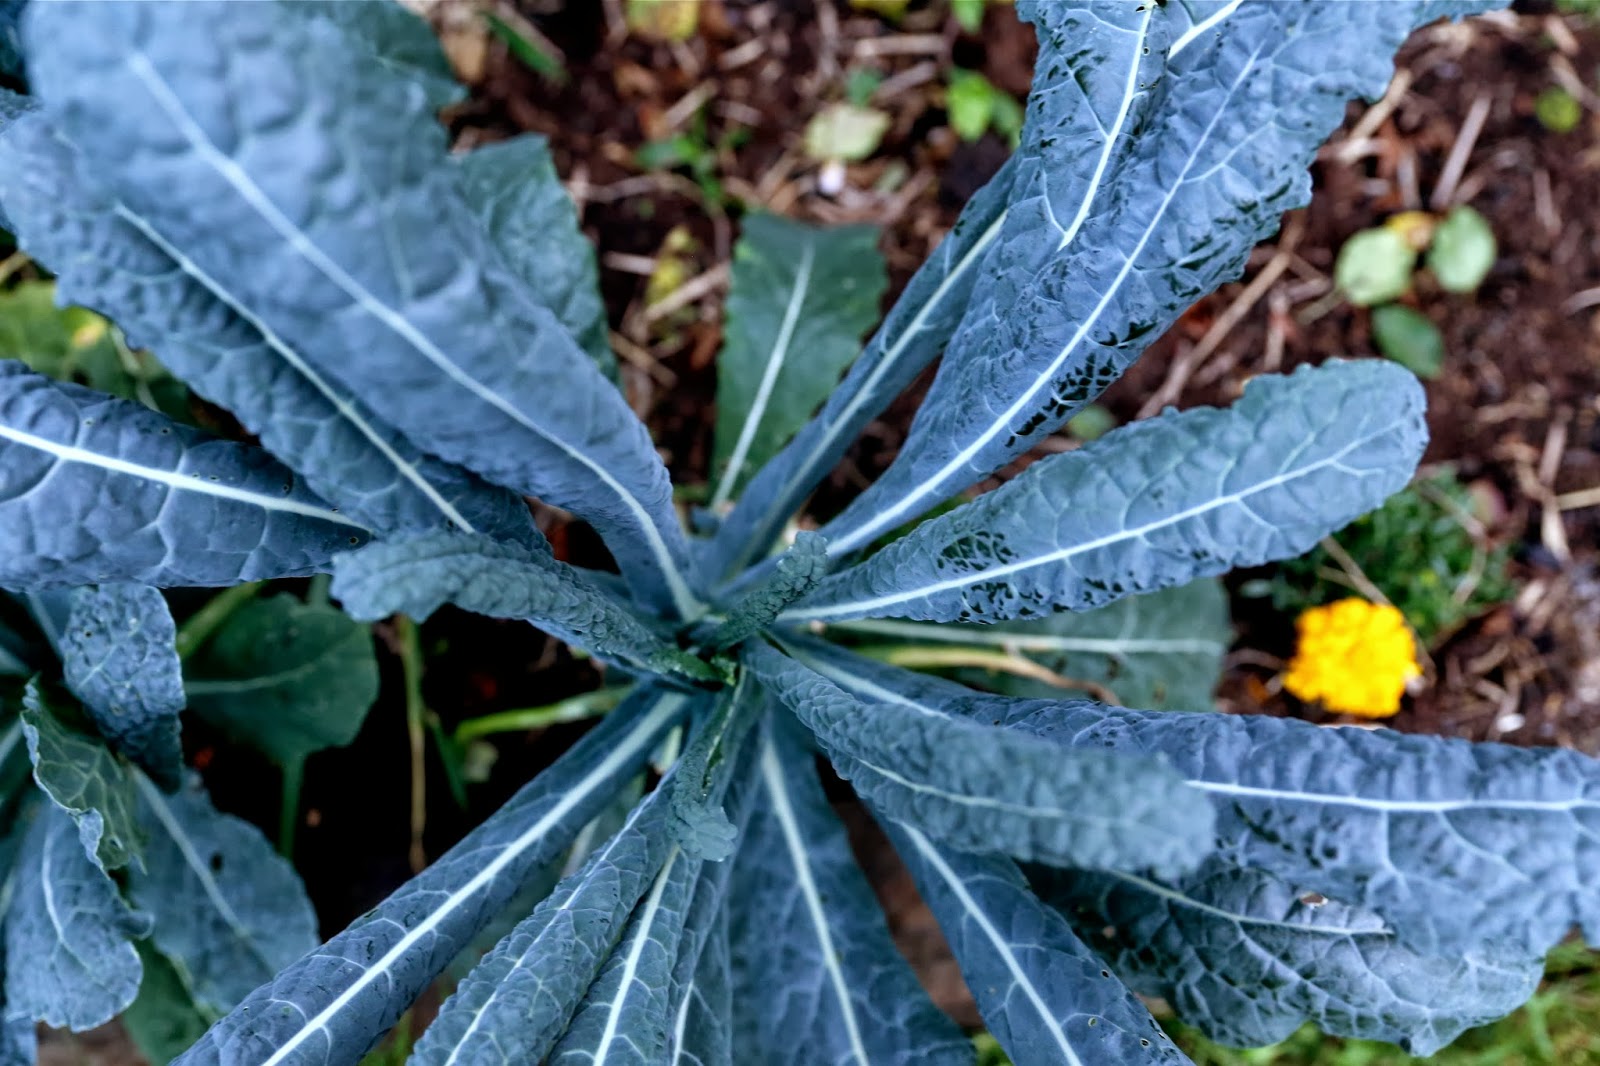
With broccoli, another classically Italian vegetable, the clue is in the name. Broccolo refers to the flowerbud which is essentially what the edible part of the plant is. We may think of broccoli, cauliflower and similar as very British brassicas, but there are many varieties cultivated in Italy. Broccoli has been grown in Italy since the 6th century BC at least and became very popular in Roman times, but wasn’t brought to Britain until the 1700s.

The large-headed green variety we think of as plain broccoli is known in Italy as Broccoli Calabrese, or Calabrian broccoli. You’ll also find red and purple headed Sicilian broccoli sold as cauliflower, and the beautiful pale green Cauliflower or Broccoli Romanesco, below, with its spiral whorls and crisp clean taste.


Italian Kale, or Tuscan kale, black kale, or cavolo nero, is the currently fashionable variety with slim straight leaves in an inky green-black, or even a bluish tinge to the tops. It grows beautifully in the south of England and is a long-lived crop. Black kale sown in the spring will be ready to start picking from August and will keep growing throughout winter. Even under snow or when the ground is frozen, you’ll still be able to cut some of this kale which makes it a good winter stand-by.


Salad greens are widely grown in Italy, especially rocket (rucola) which is ubiquitous as a salad leaf in restaurants and easy to raise in a garden or pot. The plant grows quickly and self-seeds freely, so, once sown, you will probably always have some rocket, you just might not know exactly where. Also popular is radicchio, as in the conical chicory called cicoria di Treviso and the round red radicchio Palla Rossa (see top picture), and in Rome, a particular delicacy called puntarelle, a dandelion-like plant. Puntarelle is harvested whole in autumn, then the leaves are sliced into thin strips and submerged in ice-cold water until they curl up. After drying off, the leaves are served as a crisp, slightly bitter-leaved salad.


Italian Cicoria Rossa di Treviso, harvested in November. It needs a period of cold in the ground to develop the deep red colour.
Puntarelle: the fresh-tasting, crunchy inner leaves will be welcome as a salad in wintertime. 

And then there's root veg, perhaps surprisingly, including beetroot, carrots, and turnips and of course, for the Italians, turnip leaves. Some turnip varieties, such as cimi di rapa, are grown expressly for their tops and for a famous dish with oriechette pasta.

A part of the orto will be given over to herbs. Flat-leaved parsley is an easy and inexpensive way to add an Italian note to many dishes. Oregano is grown to lend that distinctive Mediterranean note to pizzas, and rosemary always seems like a quintessentially Italian flavouring to me. Don’t be afraid of the cold with rosemary, it’s perfectly hardy and I always find you get the best flowers in the spring after a cold winter. It’s sitting in the wet that rosemary dislikes. Make sure your soil or pots are well-drained.

As befits a fairly new country – Italy only became a single nation in 1870 and some parts of what is now Italy didn’t formally join up until after WW1 – each region has its own food specialities. We are familiar with the differences in regional cuisine in Italy, it’s only logical that this extends to growing the food as well.

Italian vegetables often trumpet their provenance. Roma tomatoes come, unsurprisingly, from Rome. Genovese basil is the classic succulent-leafed version we buy fresh in supermarket pots, while basil from Naples has much larger, frillier leaves. Florence fennel is named for its city of origin. Neapolitan flat-leaved parsley comes from Naples, courgettes Romanesco from Rome again, and the long, slim, pale green squash called Serpente di Sicilia (Sicilian Snakes) are indeed from Sicily.

And this is useful when it comes to choosing varieties to grow, because while our climate is nothing like the climate in the south of Italy or Sicily, it isn’t so dissimilar to the growing conditions in the north of the country in the hills and mountains, where the temperatures are cooler and the rainfall more akin to our own.

Even this summer, which has been a cause for celebration in the UK, has seen us feeling lucky that outdoor tomatoes have ripened before the blight arrived. In Italy, any suggestion that tomatoes might not ripen would be greeted with astonishment.

If you want to grow specifically Italian vegetables, one very good place to start is Franchi Seeds, aka Seeds Of Italy. A family-run company for over 230 years, Franchi is based in Bergamo, with a UK operation in Harrow, and sources its seeds from local growers across the regions of Italy, often with the precise provenance named on the packet. You'll find their seeds online at http://www.seedsofitaly.com. Look out for their open days in the UK about twice a year when you can explore the warehouse and get plenty of good growing advice.


Wednesday, 1 August 2012

Salad days

A rose-like radicchio plant in the sunshine.
Once you have raised your first homegrown crop of salad leaves it will be very difficult to go back to bagged salad at the supermarket. Those cellophane pillows are highly convenient, but your homegrown leaves will will be juicier, spicier, tastier. You’ll know your own leaves haven’t been sprayed with anything or washed in chlorine. You’ll also be surprised to find out how long your homegrown leaves stay fresh in the fridge compared to bagged salads which start to sag and look mushy the minute you open the bag.

The Secret Garden Club looked at the very wide variety of leaves available to grow yourself, and why you might want to do that.

First, some advantages of growing your own salad leaves:
  • Choice – raise the tastiest varieties
  • Versatility – you’re not limited to what the supermarket wants you to buy (which will be stuff that looks good and keeps well, rather than the most delicious tasting)
  • Peace of mind – you’ll know the exact provenance of every leaf
  • Convenience – a pot of leaves just outside the back door, or on a windowsill, means you’re only ever two minutes away from a salad
  • Value for money – I’m always hesitant to say you’ll save money because once you add up the money for seed, pots, compost, and so on, I’m not sure it’s cheaper. It probably is. But if you get into it and start treating it as a hobby then the temptation is to spend money on it.
You don't have to restrict yourself to pulling leaves from a lettuce - there are plenty of other types of salad leaves available.

What to grow, where and how

Traditional lettuce – the type which you grow as single plants, spaced out, in order to mature and develop multiple leaves. You then harvest the whole plant at any one time.
Little Gem lettuce: succulent green leaves around
a nutty tasting heart
This is a crop for the vegetable patch – lettuces need time and space. The best way to sow lettuce seeds is indoors in modules. Each plant can be planted out in the vegetable bed when the seedlings are big enough to handle. From the seed germinating to you eating a full-grown lettuce will take about 13 weeks.

Lettuce works best as a summer crop although they will appreciate some shade in high summer. For winter salads, I grow radicchio (see the picture at the top) and chicory. As with summer lettuce we sow the seeds in modules indoors in May-June and transplant the seedlings outside when they've outgrown the plastic pods. Both radicchio ad chicory have a robust, slightly bitter flavour, and can be cooked as well as eaten raw.

Chicory can be forced in the dark to make the leaves grow whiter, more tightly packed, more tender and less bitter. Grow your plants in pots, and in autumn, cut back any growth to leave a short stub above ground. Bring the plants indoors, somewhere unheated but frost-free - a garage, or cellar, perhaps. Place a bucket over each pot to ensure all light is excluded. It takes a few weeks, but the plants will send out white chicons, which can be cut and eaten as white chicory.

Cut and come again lettuce, also known as CCA, or Mesclun, or mixed leaves. This is a much quicker and more space-efficient way to grow lettuce: instead of thinning the seedlings and letting each plant grow to maturity, you snip leaves from the plants on demand - whenever you fancy a bit of salad.  This is a quick way to raise salad – you can be eating your leaves 4-6 weeks after the seeds germinate.

Sow the seed thickly in a container or in the kitchen garden and let the seedlings grow without any thinning. Once the leaves are a reasonable size, snip them off at the base with scissors. Don’t pull whole plants up – you want the seedlings to continue to produce new leaves after each harvest.

You can also grow different varieties in the same container so that you always have a mixed salad on tap.

What you won’t get is that lovely firm, nutty heart that you get in a Little Gem lettuce or similar. If you like lettuce hearts, like I do, it’s always worth growing a few for this alone. But my main salad crops are these, mixed leaves.

Lamb's lettuce growing in an old
fruit crate.
Mixed leaves grow really well in containers (which whole lettuce plants don’t) and so you don’t need a garden at all. You can grow on a windowsill, indoors or outside – see the corn salad trough. You can grow in a reclaimed container – see the fruit crate.

You can mix and match varieties to your heart’s content to get the best taste possible from your salad or so that you can vary your salad flavours. At the Secret Garden Club we’ve got a standard leaf mix here and also an oriental mix here.

This crate was devoted to rocket, which is now well and truly in flower – don't let them go to waste, they're delicious and can be added to your salads too – and can be resown soon.

Micro-leaves
You may have seen these in fancy restaurants: tiny perfect salad leaves that still pack a punchy flavour. I suspect that if you’re trying to feed a family with salads that these may be too dainty but they’re useful to have around for a quick garnish.

All they are is seedlings. There’s no special treatment, it’s not like growing bonsais. You can use a shallow seedtray, or a small pot, because the plants won’t grow big enough to put down deep roots. Fill with seed compost, firm lightly and water. Sprinkle the seeds over evenly so that they rest in a single layer.

Cover v lightly with more compost. Then cover the tray – I’ve got the clear plastic lid but you could use a clear polythene bag – and place somewhere warm.

At this time of year, you’ll see the first seedlings in about 48-72 hours. Remove the lid but keep warm and sunny – a south-facing windowsill is ideal. The microleaves will be ready in about two weeks – again, this is a fast-growing time of year. In spring and autumn it will be more like 4 weeks.

Be brutal when cutting them for salad use, it’s not as though you’re growing them as cut and come again. Then resow – after only 2-3 weeks, you can re-use the soil.

Good for microleaves: coriander, most mixed salad leaves, oriental leaves such as mustard and mizuna.

Thinnings
Thinnings or leftovers from the vegetable patch made great additions to the salad bowl. Beetroot, chard, spinach and cabbage are all tender enough and tasty enough in seedling form to be used in salads. So when the time comes to thin or transplant the seedlings, don't throw away or compost the plants you thin out. Take them home, give them a good trim and wash and use in a salad.

This year I potted up the cavolo nero seedlings which didn't get transplanted into the main bed, transferring them instead into a 20cm pot with the seedlings evenly spaced out in it. These pot plants have leaves which are smaller, less fibrous and more tender, ideal for tearing up and using in a robust winter salad.

With beetroot, chard and spinach, I deliberately sow them thickly so that there is plenty of thinning to be done, and the thinnings always make up a nice spring salad. Similarly, when I transplant leeks the seedlings left over are delicious and delicately flavoured in a salad.

And don’t forget pea shoots. You can now buy these at great expense as part of a supermarket bagged salad – instead, why not sprinkle leftover pea seeds over a pot and use the seedlings for salads?

It also feels like food for free, which is always pleasing, as it’s kind of a by-product from another crop.
Salad of Little Gem lettuce leaves and nasturtium flowers (plus a few buffalo mozzarella pieces).

Edible flowers
We covered edible flowers in some detail at the Secret Garden Club in June. These are always good for adding stunning good looks and a delicate contrast in texture and flavour to a salad. Adding flowers to a green salad will immediately lift it out of the ordinary visually. Our post on edible flowers explains how to pick and prepare flowers for culinary use.

Nasturtiums, shown above, are first choice for adding to salads - and the leaves, finely shredded, will give any salad a good peppery kick as well. The flowers are plentiful at this time of year and are easily picked a separately to give salads a shot of hot orange or vibrant red.

Also good in salads are chive flowers, bergamot, violas and marigold petals.

Sprouting seeds
If we can have microleaves, I suppose these must be nano-leaves. Most people are familiar with beansprouts as bought in the supermarket, and possibly – if you’re feeling very healthy – alfalfa sprouts.

These are seeds which you sprout in water just to the stage of producing the first leaves, which can then be eaten raw or stir-fried. They have a delicious flavour and crunchy texture and add variety to salads. They are also highly nutritious - each sprout packing all the nutrients needed to grow the plant from germination to its first true leaves.

The beansprouts you buy most readily in the shops are grown from mung bean seeds, but of course you can experiment and find the ones you like the best.

I think mung bean sprouts can be a bit bland – my favourite for flavour are adzuki beans and also chickpeas – which can be quite large.

Here’s how to grow them. You will need a glass jam jar, with a fine mesh lid or covering. A cut-up square from a very clean pair of tights or stockings stretched over the top and secured with a rubber band is a perfect solution.

Rinse a handful of beans, drain well and put in the jar. Stretch the mesh over the top and secure - with a rubber band or similar. Rest the jar facing down at an angle so that any excess water drains away.

Twice a day, once in the morning, once in the evening, you need to pour water into the sprouts, either through the mesh or with the mesh removed. Then replace the mesh, swirl the water around to rinse the seeds thoroughly, and drain, resting the jar at a downwards angle again. The jar should be kept in the dark - but choose a cupboard you open and use fairly often or it's all too easy to forget about them!

Don't forget to rinse the jar twice daily or the seeds will dry out and not grow. Don’t forget to drain them after each rinse – if they sit in water they’ll rot.

The sprouts should germinate within a week. Use them when they about an inch or two long and before they grow their first leaves.

With a combination of all of these you can have salad on tap 365 days a year.

(Incidentally, do you know the trick to keeping bagged salad fresher? Once you’ve opened the bag and used some of the contents, fold the bag back up very tightly, getting as much air out as you possibly can, then seal the bag – I use Scotch tape. But if you have strong ziplock bags you can transfer to one of these and flatten out as much air as you possibly can before sealing and returning to the fridge.)