|
| MsMarmiteLover's aubergine curry |
Think
of curries, whether an Indian dhansak or jalfrezi, or a hot and sour Thai
jungle curry, or a Malaysian laksa rich with aromatic flavours, and we think of
exotic ingredients. A curry made with all-purpose curry powder will never taste
as good as a bespoke curry in an authentic Indian restaurant. Ready-made pastes
for specific dishes – like a Mussaman, or a Tikka Masala – are convenient but
to me at any rate they all taste rather too alike to be seriously credible.
Before
I grew my own curry ingredients, I knew that on the occasions when I’d planned
ahead and bought fresh ingredients to make my own curry powders and pastes that
the resulting dishes were streets ahead. But there are ingredients that are
very difficult to get hold of, even here in London where we’re lucky enough to
have food shops of the world on our doorsteps. So you leave out the curry
leaves, or the kaffir lime leaves, or the holy basil and the curry still tastes
great, but is missing something.
Ingredients
like lemon grass, ginger, turmeric, cumin, etc, are invariably imported and so
by the time they reach even a high turnover oriental supermarket they will have
lost a significant amount of freshness. But what many people don’t know is that
it’s perfectly possible to grow many of these supposedly exotic ingredients
here in the UK, here on your patio.
Make a
curry from ingredients you have grown yourself, that can come straight out of
the ground into your pestle and mortar and the flavours will sing out loud. No
longer will the curry be simply hot with a vaguely warm spicy taste, it will be
aromatic and you’ll taste all the sweet-sour, hot, salty, mustardy, clovey,
aniseedy flavours as they should be.
There’s
a convenience factor as well. I have cobbled together a Thai green curry paste
from scratch, added coconut cream from the store cupboard, some rice plus
whatever was lurking at the bottom of the fridge and made a fantastic fresh curry
in less than half an hour, no shopping needed. It takes a bit longer than using
a packaged paste, but it’s much nicer and much more satisfying.
Let’s
start though with some core ingredients of any spice paste. Onions and garlic
form the basis of many curry and curry pastes and these are two ingredients
that grow very happily here in the garden.
Onions
Onion sets can be planted out either in autumn or spring. The advantage of planting onions in autumn is that they will get a head start in spring next year as soon as the weather warms up and you should be lifting your onions to eat in May. There should be just enough time to plant overwintering onions now, but don't leave it any later. We planted Senshyu onions in the Secret Garden, a type specifically bred for autumn planting, spacing the onions evenly and planting them just deep enough to leave the tips slightly exposed above the soil - not too much top showing or else they will be dug up again by birds who appear to enjoy tossing freshly planted onions around the garden.
In the
summer we ran a workshop on companion planting – the beneficial effects of positioning certain plants close to each other. Onions and garlic are
well-known companion plants – the onion smell and garlic smell are said to
deter some insect pests. Onions are good for repelling carrot fly - the onion odour masks the smell of carrots - while garlic is good to plant under roses as the smell
deters greenfly.
Garlic
Now is
the optimum time to plant garlic. We would always recommend a UK-bred variety such as Solent
Wight for best results here. Check the weather forecast and aim to plant just before a cold snap: garlic cloves like to be chilled after planting to stimulate growth. Separate the garlic bulb into individual cloves and push each one into the ground, closing the soil over the tip so they are covered.
Fennel
Another spice ingredient suitable for growing outdoors is fennel. Fennel seeds are an
integral part of a number of spice mixes and this herb fennel (this isn’t the
type that grows a swollen bulb at the base) produces edible leaves, edible
flowerheads and then of course, after flowering, the seeds. These seeds are mature right now -
try biting into a fresh fennel seed and see how pungent the flavour is.
There’s
one other thing I like about growing hot chillies, ginger, turmeric and so on.
There’s something a bit subversive about it. You’re not supposed to be able to
grow these plants here in Britain, which makes it all the more fun to try and all the more
fun when you get a half-decent crop.
Chillies
Chillies are a great example of a plant that is ridiculously easy to grow. I’ve
been raising chilli plants for 10 years now, and I can’t remember the last time I
bought a chilli pepper in the shops. There’s something incredibly satisfying –
almost addictive - about growing chillies.
Not only are they easy to grow, but they mature into extremely attractive plants laden with fruit. In the Secret Garden we've grown Jalapenos, which are piquant and which are also traditionally smoked to make the Mexican chipotle sauce, and also the miniature Basket Of
Fire variety, which we picked and used in the curries served at the Grow Your Own Curry afternoon. Basket of Fire is a very hot, birds-eye style chilli – ideal for
Chinese, Thai or Vietnamese dishes.
Ginger
Ginger
is a tropical plant, but it’s perfectly possible to grow ginger in a pot,
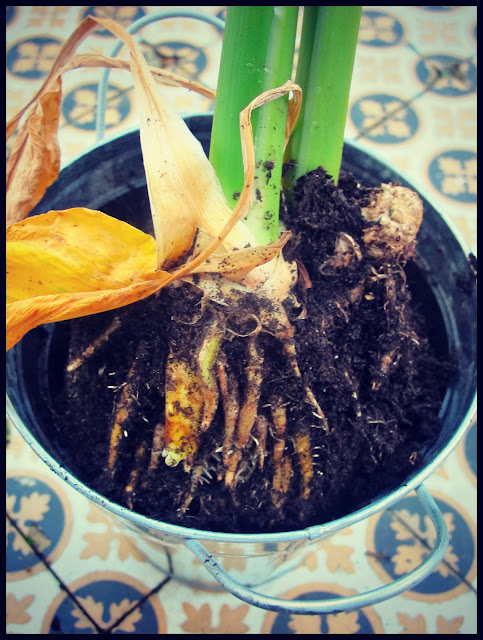
indoors, in a conservatory or on a sunny windowsill. First you will need to find a piece of ginger root with small
yellow nodules (see picture) protruding from it - these will develop into shoots. You may have to hunt around in your local mini-market and greengrocers to find suitable roots for planting.
 Plant up in rich moist compost and keep the soil moist, but not wet. Keep
temperature as constant as possible: bright windowsill against a double-glazed
window is good, heated conservatory is good. They prefer not to be in direct
sunlight. Anything above 20 degrees is workable, above 25 degrees better. The root will take up to a month to sprout but will then grow quickly throughout the
summer before dying back at the beginning of autumn - anytime from October is a good time to harvest. Do not
expect to become self-sufficient in ginger unless you have a lot of pots.
Plant up in rich moist compost and keep the soil moist, but not wet. Keep
temperature as constant as possible: bright windowsill against a double-glazed
window is good, heated conservatory is good. They prefer not to be in direct
sunlight. Anything above 20 degrees is workable, above 25 degrees better. The root will take up to a month to sprout but will then grow quickly throughout the
summer before dying back at the beginning of autumn - anytime from October is a good time to harvest. Do not
expect to become self-sufficient in ginger unless you have a lot of pots.
There's a step-by-step guide to how we grew our ginger plants here.
Turmeric
Growing
turmeric in the UK is very similar to ginger: you need to plant a piece of
rhizome with a nodule on it that looks as though it might sprout. However,
turmeric will withstand slightly lower temperatures than ginger – down to
around 18 degrees Celsius is OK, and also its leaves are edible and can be used for
flavouring.
However,
don’t imagine that you can just snap off a leaf and start chewing on it. The leaves tend to be used either in the same way as banana leaves, for wrapping
food in, or ground up into a paste, or pickled. Or the leaves are picked and
soaked to get some of the sourness out of them – then the soaking water is used
in the recipe and the leaves thrown away.
The picture here shows part of the fresh root which can be cut from the plant and used fresh, or dried and then ground into powder.
Pictured above is a Murraya koenigii, or curry leaf tree and it’s one of those times when Latin or botanical names comes in handy because this is a very different plant to the curry plant which you find on sale in garden centres all over the country.
Murraya koenigii is the plant whose leaves are used throughout Indian and
Malaysian cooking, usually quickly fried in oil and then added to a curry as a
finish or garnish.
I find
fresh curry leaves practically impossible to find over here, and dried ones
seem to me to have lost much of their flavour. They do freeze well, but again,
I don’t have much luck finding even the frozen versions.
So
instead I have my little curry tree. And it is very little –this is a young
plant and in its natural habitat it will grow into a full-sized tree, over 10ft
tall.
I
bought this plant from Plants4Presents and they’re also sold in the UK by
Poyntzfield Nursery up in Scotland. The two things to remember about keeping a
curry leaf tree happy is that 1) they’re not frost hardy so you will need to
grow them in a pot, outdoors in summer, indoors in winter; 2) in their natural
habitat they grow on the forest floor, so don’t put them out in the sun. Put
them under a tree.
Lemon grass
Lemon
grass is well worth growing in the UK – even outside. Once established,
the plants will grow vigorously, giving you fragrant leaves for flavouring, for
making herbal teas, or scenting your bath. It will also grow offshoots, which the close-up photo here shows clearly at the base of the plant, which
you can use as the classic lemon grass stalk in Thai curry pastes.
There
are three ways you can get a lemon grass plant going. You can buy seeds fairly
readily from garden centres and nurseries. Sow these in a seed tray in February
and keep warm – cover with clear plastic lid or polythene bag until the seeds
have germinated. When the seedlings are big enough they can go into a big pot,
a number of smaller pots, or, once the danger of frost is over, outside in a sunny sheltered spot in lots of good rich compost.
The
second way is to find some very fresh-looking stalks either in the supermarket
or more likely an Asian supermarket. Trim the stalks lightly then sit them in
water – stuffed into the neck of a cleaned-out Coke bottle or a plastic water
bottle that supports the stalks is a good idea. Change the water daily and you should see white roots
begin to appear. The time taken for the stalks to develop roots varies
enormously: it can be a few days, or it can be several weeks.
Thirdly, you can divide your own established plants once they’ve developed side-shoots.
Instead of using all the side-shoots for cooking, select some for removing from
the mother-plant and planting up separately.
By September you will need to harvest your lemon grass – any
that isn’t used at the time can be sliced and put in the freezer, where they
will keep very well.
Otherwise,
bring your pots of lemon grass in over winter. They will not survive
temperatures of less than 5 degrees. Give them a haircut, trimming them down to about six
inches, then continue to water them sparingly, just enough to prevent them from drying out, and they should come back to life in the spring.
One
other point to be aware of, if you have cats, is that the cats love lemon grass.
Mine regularly likes to sit on the kitchen table and chew away at the leaves.
Not great if you’re planning to harvest them later.
Kaffir Lime
The kaffir lime is a member of the citrus family which produces highly fragrant
leaves used in Thai cooking, and also knobbly-shaped limes with, again, highly
fragrant zest. I’ve had a Kaffir lime bush for five or six years now and while it isn't very prolific in terms of producing fruit, it earns its keep by giving me a hassle-free supply of Kaffir lime leaves 365 days of the
year. I find fresh leaves practically impossible to find in the shops, and the dried versions have lost much of their flavour.
Citrus trees have quite a precise set of requirements to keep them healthy. If you’re able, either by luck or design, to provide a suitable environment for a citrus tree
then it will appear to need very little maintenance. If your conditions aren’t
ideal then they’ll prove troublesome.
In summer, in the UK, they’ll like to be outdoors, somewhere sunny and sheltered. A
south-facing patio is ideal. They don’t however
like frost or wet winters so you will need to bring your tree indoors in
winter. They do, however, like to be kept cool in winter, somewhere between 7
and 13 degrees. I move mine to an unheated loft bathroom under the skylight –
it’s not too cold because of all the heat coming up from the floors below and
it’s nice and bright with the big skylight window. If you have a light, bright
conservatory that’s ideal so long as you don’t turn the heating up in winter.
In
summer, keep the soil moist; in winter keep it dry and water very sparingly.
However, it may well be worth standing the citrus pot in a tray of gravel which
you keep wet, to raise the overall humidity around the plant – they do tend to
find the air in our centrally heated houses very dry. (Another reason why the
unheated bathroom works well.)
We’re
doing a citrus workshop next month with lemons, limes, oranges, and kumquats
when we’ll go into specific detail. However, I usually say that if your citrus
looks happy: plant looking perky, leaves nice and glossy, then it is happy. A
characteristic of any citrus plant that is struggling, whether too wet, too
dry, too hot or too cold, is that all its leaves will fall off. A bald plant is
one that is in trouble.
Coriander
Coriander can be grown both for its leaves - and roots and stems, which are often used in Thai dishes - and also for its seeds, which are commonly used in spice mixes and powders.
When growing for its leaves, I find I get the best results by sowing the seeds thickly in a seed tray, keeping the tray warm and harvesting as microleaves - snipping off the leaves when the seedlinsg are just a couple of inches high.
Growing for seed is almost easier as coriander is a notorious 'bolter' - the plants often to seed. Simply collect the seeds as soon as they turn brown on the plant and let them finish drying on a plate in the kitchen before storing in an airtight jar.
You may often see what looks like coriander referred to as cilantro. I used to think it was simply that cilantro was the American word, but since I’ve started growing it as well as eating it I keep coming across cilantro in a British context. I have seen it suggested that coriander is grown for seed and cilantro for leaf but also that coriander refers to the whole plant: roots, stem (which are also edible and much used in Thai cooking) and all, while cilantro is the leaf only.
Thai basil
Until
about six weeks ago I would have been recommending these wholeheartedly as the
kind of herb which is not only easy to grow but also impossible to buy in the
shops. Then my local Waitrose started stocking it in the fresh cut herbs
sections. Thai basil is the variety that gives Thai curries that sweet licorice
scent, and ordinary basil leaves just don’t work the same way. It’s incredibly
easy to grow Thai basil in a pot on a sunny windowsill and one medium-sized pot
will keep you in basil all summer long.
I grow
lots of different types of basil, all in the same way. Get a medium pot with
drainage holes and fill it full of good compost – multipurpose will do but it
needs to be fine rather than rough-cut. Water it well. Sprinkle the seed over
the surface – be generous, but keep the seed in a single layer. Cover very
lightly with a layer of fine compost, so that the seed are just covered. If
you’re sowing before April, cover the pot either with a fitted cloche, or a
clear polythene bag stretched over the lip of the pot. April or after, you can
leave the pot uncovered.
Put
the pot in your sunniest windowsill: basil likes lots of light. The seeds
should germinate by the end of a week – just three or four days at the height
of summer – and once they’re through you can remove the polythene covering.
Keep
them growing on the windowsill and start cutting when the leaves are big
enough. Try to snip leaves from all over the pot: if you completely denude one
seedling down to a bare stalk it won’t grow any more leaves. But if you pinch
out the leaves at the very tip of the plant it will regrow quite happily. Water
regularly to keep the compost moist and your pot should last all summer. Thai
basil will start producing purple flower buds which can be snipped out and used
as well as a garnish and flavouring.
After
much experimentation I have come to the conclusion that here in the Uk, basil
is an indoor plant. Outdoors, they fall prey too easily to aphids (greenfly),
they get watered too irregularly and blown about in the wind. A warm sunny
windowsill with still air and not so much temperature fluctuation will give you
much more succulent leaves.
Holy basil
Often
confused with Thai basil, this has smaller, more rounded leaves which are a
matt green (or flushed with red, if it’s holy red basil) and slightly hairy. It
looks frankly a more nondescript plant than the striking Thai basil. The
flavour of the leaves is spicier, hotter, less sweet. Holy basil is also
associated with Thai cooking, in stir fries, stews and rice dishes.
You
can grow holy basil in exactly the same way as any other basil, but I’ve found
it less prolific than the other basils and slower to grow.
Fenugreek

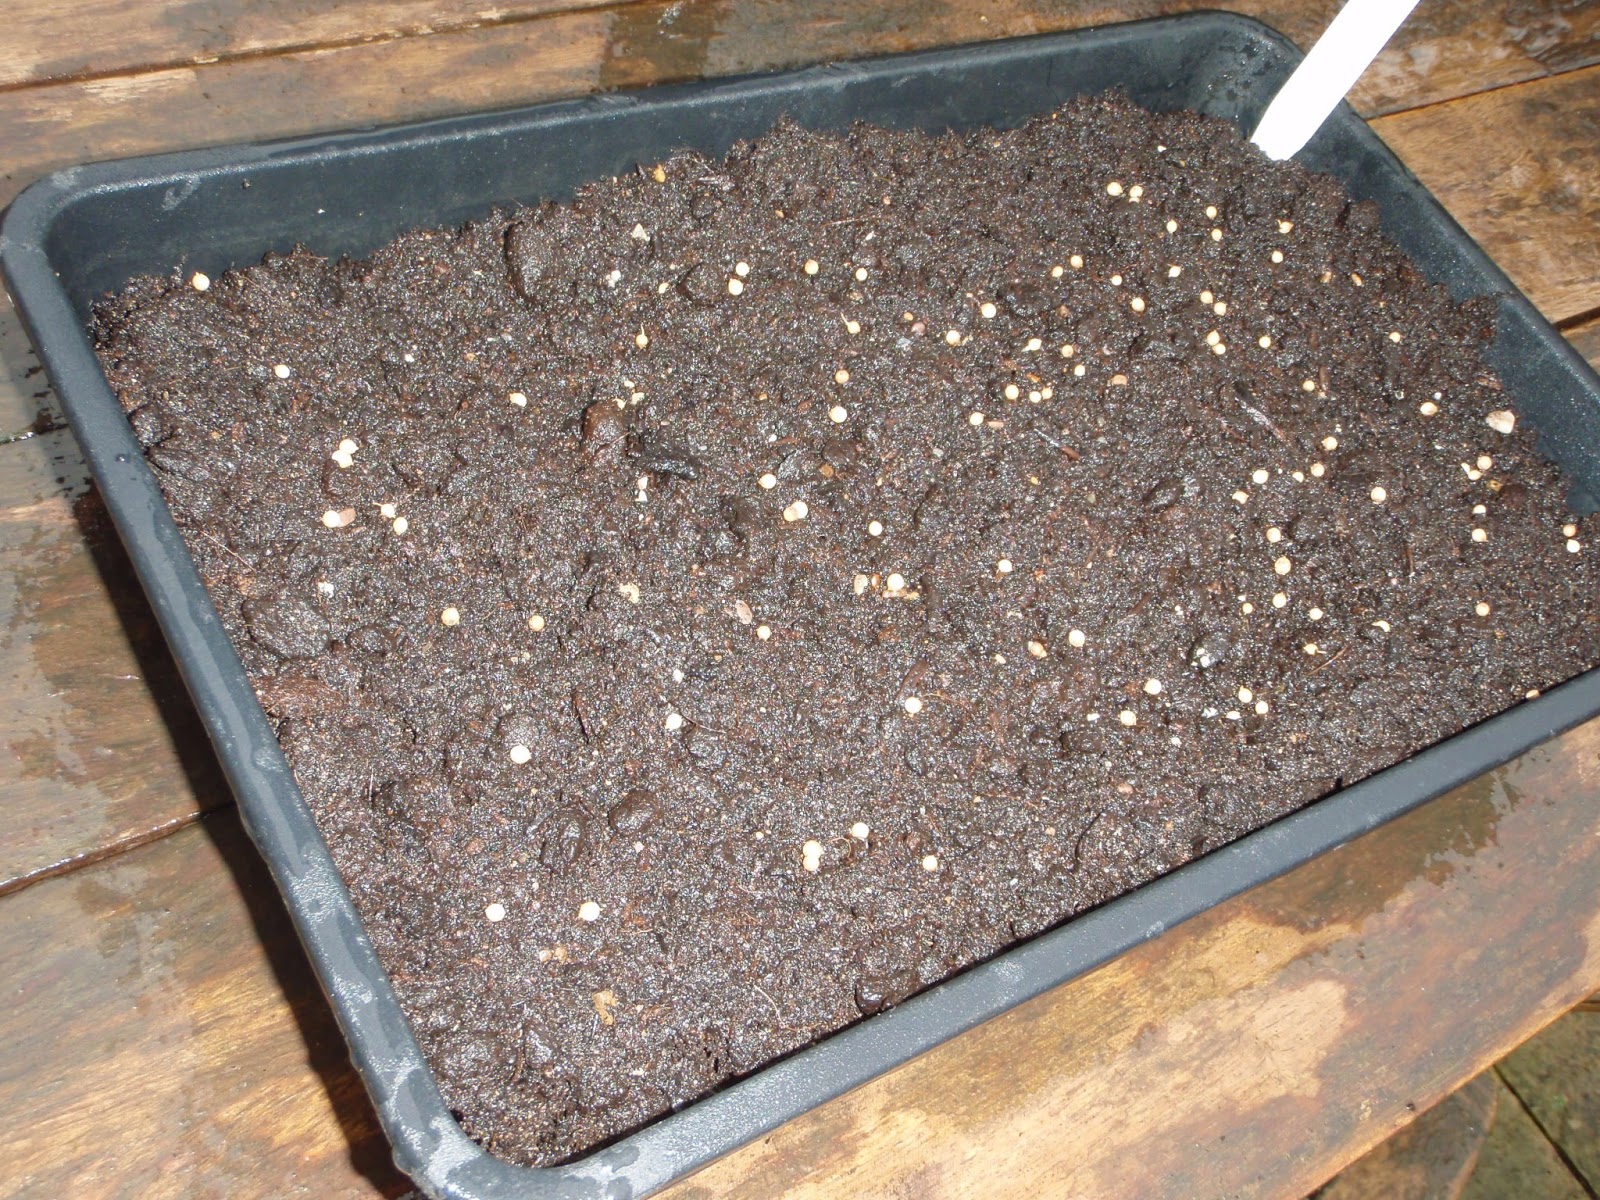
Like coriander you can grow fenugreek, or methi, for the leaves or seeds, both of which will give your dishes a distinctive mustard flavour and aroma. You can grow fenugreek from the seeds you buy in the supermarket. You can grow as separate plants or, a better solution at this time of year, is to grow as microleaves (pictured, left). Soak the seeds for about eight hours or overnight in clean cold water, then spread them evenly over a seed tray filled with compost. Cover the seeds very lightly with compost, and place a clear lid or polythene bag over the seed tray. Place somewhere light, bright and warm and the seeds should germinate in just two to three days.
There are two distinct types of fenugreek. The more common large-seeded variety has white flowers, and can only be cut once so once you've harvested, you'll need to sow some more. The smaller seeded variety has slightly smaller leaves, yellow flowers and will regrow after cutting.
If you're growing to raise single plants to maturity, soak the seeds first as above, then sow directly in a well-drained sunny spot. Sow the seeds thinly and just cover with soil, any time between April and August. Fenugreek will survive a light frost so is worth sowing sowing successionally throughout the growing season.
Cumin
There’s no reason why you can’t grow your own cumin plant in a sunny sheltered spot in the garden or in a patio container, or on a windowsill if you have the space. It’s an umbellifer, so related to caraway, fennel, and also carrots and parsnips. However, most of the world’s cumin is grown in the Middle East – it prefers daytime temperature consistently in the mid-20s Celsius.
If you’re going to try them outside, sow the seed indoors and keep warm until the seeds germinate. Once the seedlings are large enough to handle, transplant to pots, about three to four seedlings per pot. These can be then be kept indoors to grow on, moved outdoors once all danger of frost is past (say, late April), or the plants can be transferred to an outside border. Then pray for a long hot summer.
Simpler is to sow the cumin seeds directly in the large pot you plan to raise them in. Sow indoors as above, thin the seedlings once they have all germinated and decide whether to keep it indoors or move it outside depending on how the weather pans out. Last summer, for example, they would have stayed in.
It’s an attractive plant with feathery leaves, but you will be growing it for the seeds – another reason for needing a long season. The flowers are white (sometimes pink), after flowering you should see the seeds form. Pick them off the plant when they turn yellowy in colour and let them dry somewhere sunny – on a plate in the kitchen, say – until they go brown. Then they’re ready to be stored in a clean airtight jar and used as you would use the shop-bought version. Cumin seeds mature at different rates – there won’t be one single day when you can go and harvest all the seeds – so you will need to keep an eye on the plants and pick off the seeds as and when and add them to the kitchen plate.
I think it would be going some to grow enough cumin to become self-sufficient, but you should get enough for a few special occasion meals.
Fancy a challenge?
The plants listed above are all relatively easy to grow, whether indoors or outdoors, and should give you a decent harvest in favourable conditions. The spices and aromatics listed below present far more of a challenge - often because even if you managed to raise a tropical plant in the UK climate, you would have to wait many years for the plant to mature and produce its edible seed. It's not too surprising, therefore, that spices have been so highly prized and priced throughout history.
Cinnamon
Cinnamon is grown mainly for its bark, though its leaves are used in curries as well. It has been a much-prized spice for hundreds of years - there is a fascinating history of the trade in cinnamon here .
You won't be able to grow cinnamon for its bark in the UK, but you could grow it in a pot in a conservatory and use leaves in teas and curries.
To use as a garnish, try growing cinnamon
basil – a basil variety whose leaves have a definite cinnamon aroma. This can be grown exactly as Thai or ordinary
basil.
Cardamom
Cardamom is a tropical rainforest plant. Best place would be a
steamy bathroom, or an indoor heated swimming pool, should you have one. Kew Gardens has some advice on growing cardamom plants here, and Plants4Presents currently has plants for sale.
Don’t
sow the culinary seeds that you buy in the shops, as they’re harvested unripe and then dried for kitchen use.
Saffron
Saffron is extracted from the stamens of the saffron crocus. It's a painstaking process which must be done by hand, which is why saffron has traditionally been one of the most expensive spices in the world. I have tried growing crocuses for saffron, with dismal results, but there is a good online guide at Nurseries Online here. You plant
in the summer and harvest saffron from the stamens of the flowers in autumn.
You’ll need a pair of tweezers and it’s very fiddly.
Star anise
In theory, growing star anise, which is native to China, would be perfectly possible as a pot plant, indoors in winter, outdoors in summer. If only I could find
one - and if anyone knows of a star anise plant supplier in the UK, please tell me!
The star anise likes acid soil – it’s distantly related to magnolia – and lots of water.
Once you get the plant established, it could be up to 10 years or more before it bears flowers and fruit – the star anise itself is the dried egg-shaped fruit in the star-shaped casing.
The star anise ‘flowers’ that you buy here have been picked when immature and
unripe and then dried, so you can’t reconstitute the seeds and grow the plant
from there, unfortunately: the seeds are undeveloped and empty.
Peppercorns
The peppercorn vine is native to India and grows happily in
Vietnam, but temperatures here, even in a greenhouse, are just too low.
Peppercorns are the fruit of the vine, which are dried and can then be further
treated. Black pepper, for example is cooked and dried peppercorns; green
pepper is dried unripe fruit and white pepper is made up of dried ripe seeds.
Pink peppercorns, however, are from a different plant: the Peruvian pepper
tree, Schinus molle, or its relative the Brazilian pepper tree, Schinus
terebinthifolius.
Although
conventional pepper can’t be grown here, you can always try Szechuan pepper,
which is comparatively easy - see Mark Diacono's guide in his book A Taste of the Unexpected.
Szechuan
pepper is botanically related to citrus plants rather than pepper vines, but it
will still give you a hot peppery hit along with some more complex citrus notes
as well. It’s hardy in the cold and so long as you plant two of them (a male
plant and a female plant), they will supply with you fruits – the Szechuan
peppers – for a good few years.
Cloves
Originally from the Indonesian spice islands, cloves like it hot and humid. In its natural habitat a clove seed will develop it a full-grown tree up to 12 metres tall and spreading eight metres; it's next to impossible to recreate the conditions it likes in the UK outside a very large heated glasshouse. Bear in mind also that what is sold in the shops is a dried flower bud, not a seed, so cannot be planted, and that it takes 20 years for the trees to start producing flower buds.
Nutmeg
See cloves, above, for the optimal growing conditions, although they are speedy developers in comparison since the first nutmegs, the seeds of the tree, will be produced about 7-9 years after planting.
General tips for growing spice plants
- These
will tend to be tropical plants; by default in the UK they will have to come indoors
in winter;
- Many
also tend to grow in rainforest conditions; they don’t necessarily need lots of
hot sun, but moist warm shade;
- Plants
which grow on the forest floor are used to lots of organic matter but not
necessarily very fertile soil;
- Don’t
assume that a plant with edible seeds will have other edible parts, eg, cumin.
(Although it might have, eg, turmeric);
- Choose
whether to try to grow your plant from seed – may be cheaper and more
obtainable, or whether to buy a plant to nurture – may be the only viable way
to acquire;
- When
searching the Internet for cultivation advice, check whether the site is
referring to the UK, US, Australia or indeed anywhere else. You’ll find sites
telling you how easy it is to grow cinnamon or talking about the benefits of
growing lemon grass as hedging, and then find they are talking about Louisiana
and Brisbane respectively.
 |
| The Secret Garden Club's ginger harvest |
 |
| Guests were able to take away a selection of seeds, a handful of overwintering onions and chillies picked fresh from the plant, to try raising their own spice plants. |