Showing posts with label sweet pepper. Show all posts

Saturday, 28 February 2015

Bringing Mediterranean sunshine to a London patio


A sunny day in February brings hope and a promise of spring to come like no other. The days are getting longer, the light is higher and stronger ... and it always reminds me that it's time to sow my Mediterranean vegetable seeds.
Compared to the Mediterranean climate, our English summers are cool and wet. But by starting early and waiting patiently until the end of the season, we can raise a fine crop of Mediterranean produce such as tomatoes, aubergines and peppers, both the hot and sweet varieties.
These are extraordinarily satisfying vegetables to grow: the plants are attractive and the colourful fruits bring the patio to life as they ripen. Being able to pop out to pick a chilli to spike up a supper dish (not hot enough? Just go and get another one) or to eat a tomato straight from the bush like an apple is immensely rewarding.
In the UK these vegetables are ideal for people with limited outdoor space, as they do well in containers. There's not reason why you shouldn't grow tomatoes and chilli peppers in the open ground, but in a nice big pot you can choose exactly the right place to put. Aubergines and sweet peppers definitely like somewhere warm and sheltered: the hot spot on the patio, perhaps, or better, one of those soft plastic grow-houses with the door left open once summer is underway.
In April, the Secret Garden Club will meet to discuss all aspects of growing Mediterranean vegetables: focusing on tomatoes, aubergines, chillies and sweet peppers, but with a nod to courgettes, beans, and leafy greens as well. We'll explain how you can make sure your Med crops grow and fruit successfully, and look at the possibilities of grafting the plants to make them stronger and more fruitful. The afternoon finishes with a Mediterranean-themed meal created and prepared by MsMarmiteLover: in the past, guests have enjoyed homemade sourdough with tomato butter, chocolate aubergines, peperonata, and tomato confit with vanilla cream.
Growing Mediterranean veg: how to start

Now is the ideal time to start off your Mediterranean plants if you are growing from seed. Tomatoes, peppers and aubergines will not withstand frost, so you need to find a warm sunny place indoors for them. A south-facing windowsill is ideal. 

  • Take clean 3-inch pots and fill with seed compost (available from garden centres) to about 1cm below the lip of the pot. 
  • Use a watering can with a rose (diffuser) to water each pot well.
  • Place two seeds on the surface of the compost per pot. Cover very lightly with more compost.
  • Label the pot carefully: either use a marker pen on the pot itself or a plant label in the pot. While tomato seedlings are quite distinctive, aubergines and peppers are easily confused when they're tiny and chilli seedlings look just the same as sweet pepper seedlings!
  • Put the pot in your warm and sunny place to germinate. You can place the pots in a larger seed tray with a clear plastic lid, or cover each pot with a polythene bag to help speed up germination.
  • You should see the first tomato leaves emerge after 3-4 days, aubergines 4-5 days and peppers in about a week, maybe even longer.
  • Once the seedlings appear, remove any plastic covering and leave them to grow on. 
  • Water gently and try to get as little water on the new leaves as possible.
  • Keep seedlings indoors until all danger of frost is past. Then they can be planted out into the open ground or into containers.
Join us for Mediterranean Food at The Secret Garden Club, Sunday April 26th, starts 2.00pm.
Tickets £40 for workshop and lunch. Bring your own alcohol.


Wednesday, 18 April 2012

Tomatoes, peppers, aubergines, and courgettes - the best of Mediterranean vegetables

To encourage the British to eat more healthily, one of the most persistent recommendations has been that we should adopt a more Mediterranean-style diet. People living in (particularly) southern Italy, and Greece have historically lived longer, with lower rates of coronary heart disease.
I'd hazard a guess that the foods most closely associated with a Mediterranean diet would be tomatoes, garlic and olive oil. In fact, it goes wider than that. Most often quoted is Dr Walter Willett of Harvard University's School of Public Health, who described in the 1990s, the emphasis on "abundant plant foods, fresh fruit as the typical daily dessert, olive oil as the principal source of fat dairy products (principally cheese and yogurt), and fish and poultry consumed in low to moderate amounts, zero to four eggs consumed weekly, red meat consumed in low amounts, and wine consumed in low to moderate amounts..."
Those abundant plant foods would certainly include tomatoes, sweet and hot peppers, aubergines, courgettes, and beans and pulses, the last often preserved by drying. The fresh produce on this list are of course readily available in shops all the year round, although this loss of seasonality seems to be accompanied by a corresponding loss of flavour.  Even in season, we appear to prefer to source our peppers and aubergines from Holland rather than the heart of the Mediterranean itself.
You can of course, try recreating a little corner of Greece or southern France in your own back garden by growing your own Mediterranean vegetables. They may not be ideally suited to the UK climate, but with a little care and by making the most of our comparatively short season, you can grow your own Med produce. And there are plenty of reasons why you should:
  • The fruit and veg themselves are delicious. Your own tomatoes, sweet peppers, etc, will taste better than those you buy in the shops …
  • ... and so they will remind you of holidays and travels to the Mediterranean region. To me they are always redolent of summer and sunshine. That sweet tangy burst of tomato juice, the fragrance of thyme, a squeeze of lemon juice over a salad … it all says summer.
  • I think there’s an element of wish fulfilment in growing fruit and vegetables that should really do better in warmer climates. We’ve had a succession of mild but wet summers in the last 5-10 years, but if you can raise a crop of aubergines, perhaps you can kid yourself that our weather’s not so bad after all. There is definitely a sense of achievement to be had in growing these tender crops.
As a grower, you can make things easier for yourself in a number of ways. The Secret Garden Club met last Sunday to explore ways in which the cornerstones of the Mediterranean vegetable diet could be adapted to grow on the British patio.

Individual foods are discussed below, but there are some general principles that hold true for all:
  • Choose a suitable variety. There are varieties of tomato from Siberia, chillies from Poland, aubergines that have been bred to thrive on northern Italian hillsides rather than Sicilian glades. Bear this in mind when browsing the nursery catalogues.
  • Mediterranean veg like warmth and light. Give them as much as possible. Don’t expect them to do well on a north-facing slope. Try a south-facing patio instead; against a sunny wall; in a greenhouse, even if it’s a soft plastic version.
  • Don’t overwater them. They won’t like being drowned in a wet English summer. This of course is good news as we labour under a hosepipe ban. But not even tomatoes like too much water: it will make their skins split.
  • Do give them a long season. I sow my Mediterranean vegetable seeds in February, and I don’t expect aubergines before September, peppers before August (usually) or tomatoes before August – with a few exceptions that we’ll come on to later.
Tomatoes

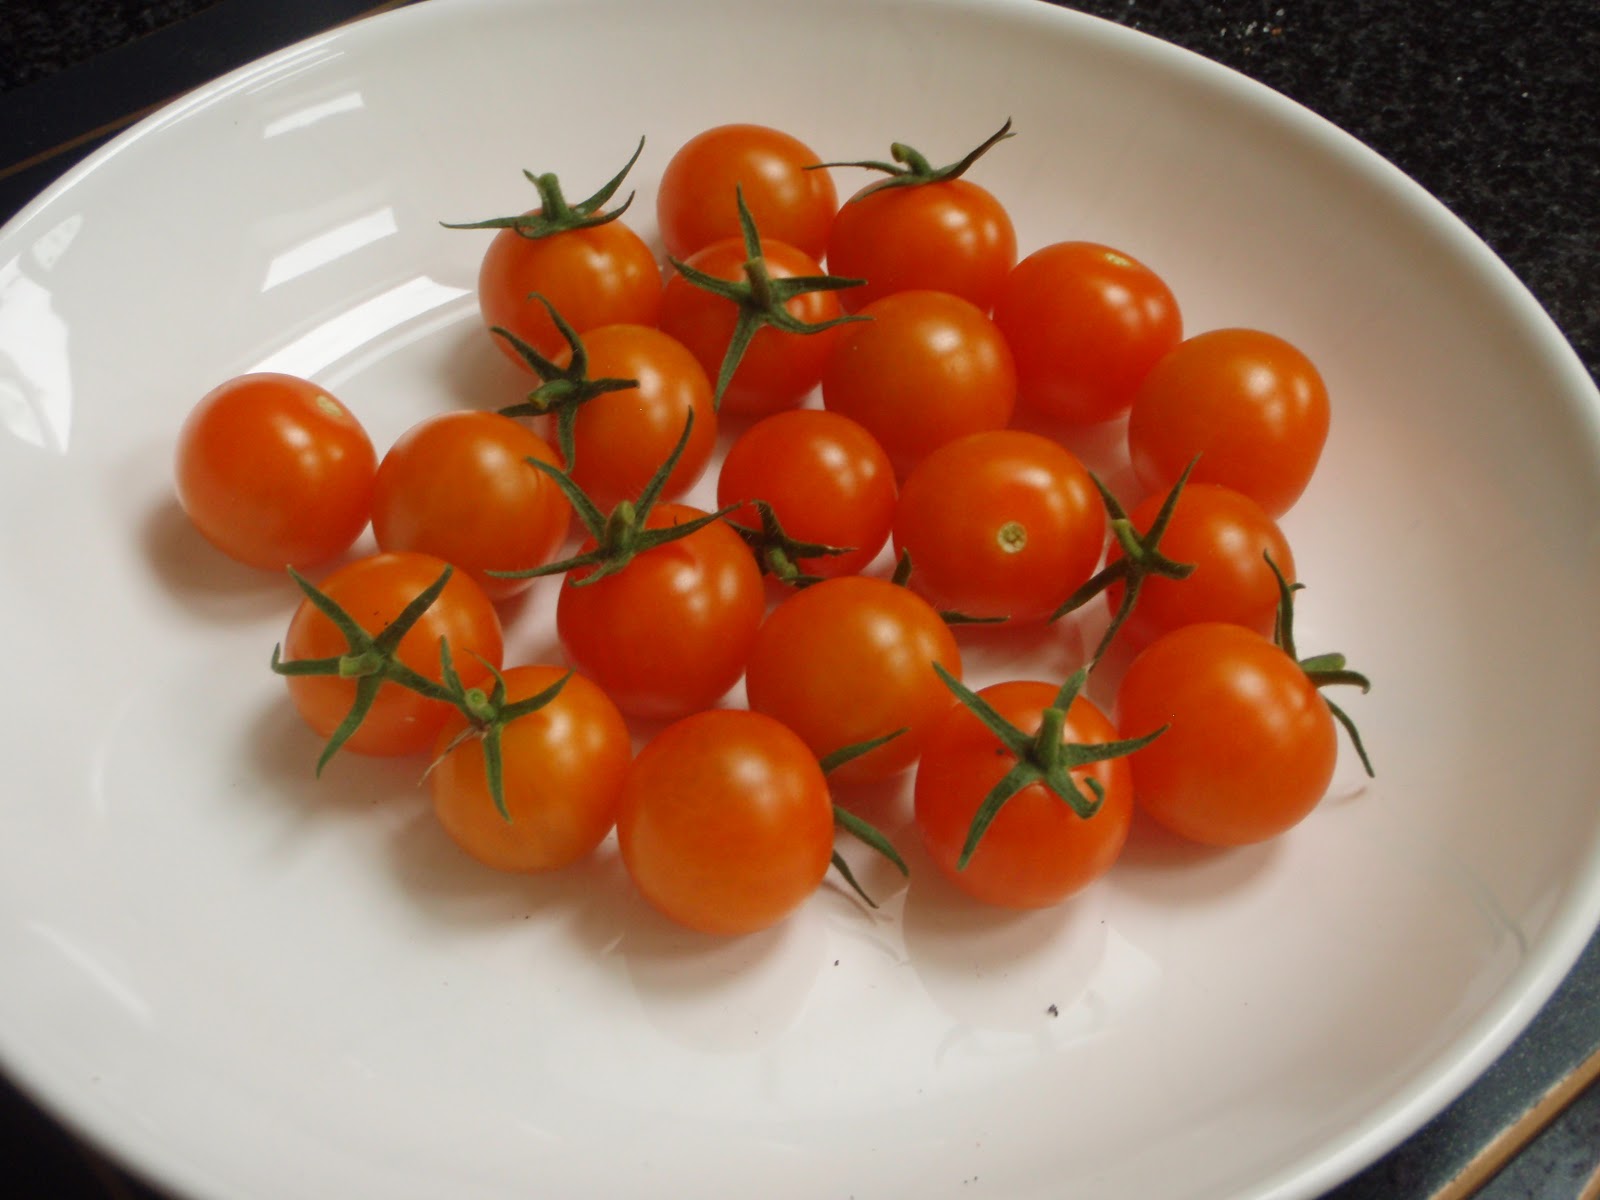
Sungold tomatoes, freshly harvested.
The UK climate is not really conducive to growing tomatoes. Too cool, too humid, too short. Tomatoes are prey to a number of disorders and diseases which are beyond the gardener’s control.So a lot of the work involved in raising tomatoes is done to combat the effects of growing them in a hostile climate.
But every time I eat a really ripe, flavoursome homegrown tomato, it’s worth all the trouble. There is no tomato on sale commercially in the UK that tastes as good as one you have grown yourself.
Tomatoes can be grown in London both in a greenhouse and outdoors; either way you can start sowing seeds as early as the end of January or as late as April. I usually sow a batch in February and a late batch of Sungold tomatoes about now. The plan is to give myself as long a season as possible, and I’ve found from experience that Sungold still taste good when they ripen late – in autumn sun rather than summer sun.
Sow in modules or pots, two seeds to a pot. Place indoors or under glass until the seeds germinate. If you sow in January or February, keep the pots indoors in a consistently warm and light place. By March and April, in an unheated greenhouse should be fine.
Don’t transplant to the final planting place until all danger of frost is past. You can grow tomatoes in pots, in a grow-bag or in the open ground. There are advantages and disadvantages to each, but in practice it will probably depend on the space you have available.
  • In pots, you can position the tomatoes in the best place to get the best of the sun. They will need regular watering, perhaps daily in the height of the summer.
  • Grow-bags are an easy option: buy the bag, cut a top in the top, plant the tomato and off you go. They can also be positioned where you want them. But staking and supporting the tomatoes can be a problem with grow-bags if they are placed on a patio or a deck, and they will also need very regular watering in summer. Grow-bags are also, to my mind, rather unsightly.
  • In the open ground, the tomato plants can send down roots to find moisture. They won’t need as much watering – which is good news in this time of drought – or as much support. However, this assumes that you have a bed free in a sunny sheltered position, otherwise it may be too windy for your plants. You may also get more in the way of soil-borne pests.
Reluctantly, I’m going to recommend growing them indoors. In a conservatory, under a skylight, or in a greenhouse. I say reluctantly because in a good year, outdoor grown and ripened tomatoes taste amazing. But I think we don’t have enough good years. Tomatoes will more reliably ripen under glass, and it is also easier to protect them from blight, the most common problem to affect tomatoes grown in the UK. There's more about blight further down this post.
Use fresh dedicated tomato compost. I think it’s a valuable precaution against soil-borne diseases. You can always re-use the compost as a mulch on non-tomato, (and non-potato) crops afterwards.
Water regularly. Irregular watering will lead to blossom end rot. A good soak once a week, plus feeding once the fruits start forming should keep the plants happy.
When watering, don’t splash the leaves. Deliver water directly to the roots. One very good way to feed tomatoes, whether they’re in a pot, a grow-bag or in the ground, is to lop the bottom off a plastic water bottle, remove the cap and push it, cap end down, into the soil next to the plant.
Pinch out side shoots. If you have what is called an indeterminate tomato plant, that is, one that grows tall and straggly, you are advised to remove the shoots that grow between the main stem and the leaf. If you don’t, you’ll get a very vigorous green plant but not many fruits.
As the trusses, ie, the stems bearing fruit, form, remove the leaves around them to let the air circulate.
In any case, shop around, in nurseries or online, to explore the wide variety of tomatoes available. The plants sold in garden centres, such as Alicante, Tumbling Tom, Gardeners Delight and Moneymaker, tend to be those that can withstand manhandling, rather than those that taste best.
You can buy cherry tomatoes in brown, red, yellow or green, or striped, or beefsteak tomatoes, in small bushes or huge vine-like cordons.
At some stage during the summer, your tomatoes will almost certainly get blight. Greenhouse tomatoes may be protected to a certain extent, but all tomatoes grown outdoors in the UK will get blight sooner or later.
Blight is a fungal organism. It lives in the soil and is activated on cool humid days, typically in July. The spores are then carried on the air. Blight can sweep through an allotment, or an area where lots of plants are grown close together, like wildfire. So one preventative measure is to grow your tomatoes a considerable distance away from other tomatoes.
From July onwards, check your tomato plants regularly. The first signs of blight will be a blackening of the edges of the leaves, so that they look almost sooty. Remove any leaves that look like this immediately and ideally burn them. Don’t put them in the compost.The other tell-tale sign of blight is black patches on the stems. Again, try to remove these as soon as you see them – difficult if it’s the main stem.
If the fruits are near to maturity, you can try removing them and ripening them on a sunny windowsill indoors. Heart-breakingly, green fruits that look OK often develop brown blight patches and rot while ripening.
There are blight-resistant varieties – Ferline, Legend, and also a heritage tomato called Broad Ripple Yellow Currant. They’re not always the best-tasting.
If you grow a very early-ripening variety such as Red Alert, First In The Field or Glacier, you should get fruits before July which is usually the earliest time for blight to appear. 
One very interesting way to stack the odds against blight and other disorders in your favour is to consider grafted tomato plants. This is a plant where the fruiting plant has been grafted on to a disease-resistant root or rootstock. You get the disease resistance from the roots, plus the good fruiting characteristics of the top half of the plant. Grafted plants are becoming available in the larger garden centres and nurseries but are considerably more expensive.

You can also try grafting your own tomato plants - we included a grafting session in Sunday's Secret Garden Club and guests were surprised by how uncomplicated an operation it is. See here for a step by step guide to grafting tomatoes.


Peppers
Caldero peppers, a hot-but-not-too-hot variety.

Sweet peppers and hot peppers, or chillies, are varieties of the same species, Capsicum annuumLike many other vegetables that we think of as Mediterranean, peppers came to Europe from the Americas.
The heat in chilli peppers derives from a substance called capsaicin (and related compounds), and the heat of a particular variety can be measured in Scoville units.

  • A sweet red pepper has a Scoville rating of 0.
  • A jalapeno, quite a mild chilli, is between 2,500 and 5,000.
  • Habaneros, some of the hottest peppers, are around 300,000 Scoville Heat Units.
  • Recently, there has been much interest in developing the ‘hottest’ chilli, and giving it a suitably macho name. According to the Guinness Book of Records, the hottest chilli in 2011 was the Trinidad Scorpion Butch T pepper, at nearly 1.5m SHU.
Peppers used in Mediterranean dishes are either sweet or mild to moderately hot. As well as flavour, and colour, there’s another good reason to grow your own peppers: they are easy to grow.
Indeed, if you have somewhere light and consistently warm indoors – under a kitchen skylight for example – you can bring them in at the end of summer and grow them as perennials. Chilli plants seem to do better over-winter than sweet peppers.
However, when you start off sowing pepper seeds, there are some things to consider.
  • Do shop around: check the catalogues and online. There are 100s of sweet and chilli varieties available.
  • The seeds will need to be sown early in the year, in January or February.
  • They will also need heat. If you have a heated propagator, that’s ideal. If not, then identify a sunny warm windowsill where the heat will be fairly consistent.You can start your peppers off in seed modules to save space, or in 3-inch pots, which will save you one potting-on stage later on.
  • Fill the module or pot with seed compost, soak it well and let the water drain. 
  • Sow two seeds per module on top of the compost, then sprinkle with dry compost so that the seeds are only just covered.
  • Cover the pots – with the clear propagator lid or a polythene bag attached firmly to the pot with an elastic band.
  • Then leave them be. They should germinate after 10-14 days, after which you can remove the covering and the bottom heat if you used a propagator.
If you started them in modules, they will probably outgrow them in about a month and will need to be transferred to a small pot. Don’t pot on until they have four true leaves.
They will also probably be looking a bit straggly and long-stemmed from being raised indoors. This is OK: when you put them in a pot, bury the stems in deep to make them sturdy. The potting-on stage is also the time to discard the weaker seedling of the two sown together.
If you’re growing more than one variety, be meticulous about labelling them. All peppers, sweet or hot, look exactly the same at this stage.
Your peppers will need to stay inside until the risk of frost is over. Even here in London, I’d be cautious and say that’s the end of April. Once the days are warm – and especially when the nights are no longer truly cold, generally in around mid-May – the peppers can be transferred to their final pots and moved outside. Or you can grow them in the open ground. Either way, you need to find somewhere sunny, and not too windy and they should do well.
They will need to be hardened off before going outside permanently. Hardening off just means getting the plant accustomed to being outdoors gradually, over a period of a week or so. Indoors there’s no wind, and much more gradual fluctuations of temperature, so for a plant, going outdoors all at once will put it in a state of shock.
Most plants will recover but it will check their growth. Hardening off properly makes your plants much sturdier.
As the plants grow, they will probably need some support. They’re not climbers, but they will appreciate the main stem being tied to a stake, as many varieties will grow to about 60-75cm tall.
They will, of course, need watering and this is topic of some concern in the current drought. The good news is that they don’t need masses of water. Sweet peppers need more than hot peppers. Peppers grown in the open ground will need less water than those in pots.
Water them when they look thirsty – the leaves may start to look a little limp or lose their gloss.
Your peppers will self-pollinate. You should see the delicate white flowers in late May and into June and July. The flowers point down like an umbrella and as the blooms fade, you’ll see the green fruit beginning to swell behind them.
You can start picking and using peppers when they are green. However, with sweet peppers you won’t get the full flavour or the benefit of the rainbow colours. Where possible I think you should let the fruits mature.
Green chilli peppers won’t be as hot as the ripe versions, whatever the variety. Chillies also develop heat as the summer wears on, so that an early red chilli picked in August will be milder than one from the same bush picked in October.
Harvest your peppers before the first frost – which could be as early as October, so keep an eye on weather forecasts. If you’re overwintering your plants, bring them indoors in October as the nights get colder.
The one other thing to do with your peppers to keep checking them for pests. They are not prone to pests and disorders and thankfully don’t seem too attractive to slugs. If they are in a greenhouse, there are the usual greenhouse pests to look out for: red spider mite and whitefly. Look for a sticky residue on the leaves, or a fine white webbing between the leaves and stems.
Outdoors, pepper plants do seem to be something of an aphid magnet. These look like tiny green discs on the underside of leaves and it’s worth checking regularly for them. Again, they leave a sticky sheen on leaves and stems; also look for tiny white flakes on the surrounding soil.
Now, my bespoke solution for aphids and red spider mite, etc, on mature plants (not seedlings) has always been to blast them with water from the jet nozzle on the garden hose. They either get blasted off the plant altogether, or they drown in the deluge. I’m not sure this method is allowable during a hosepipe ban unfortunately.
The classic anti-aphid treatment is to spray with mild soapy water, and I stress mild. Neat washing-up liquid is more likely to kill the plant off.
In either case, make sure the plant is clean before bringing it into the house for winter. I’ve had many aphid outbreaks after bringing pepper plants into the cosy warmth of the house.

Aubergines
The white aubergine variety Tango is firm-fleshed and sweet.
Aubergines are a little trickier in the British climate. While I’m happy to grow peppers outside, I prefer to keep aubergines under cover. Even in high summer, I’ll have them in a soft plastic greenhouse with the door open. 
And this makes them prey to greenhouse pests, especially aphids. I do quite a lot of spraying and wiping with the aubergines. 
Sowing and raising them is very similar to peppers. Start them off in February in the warm, sowing two seeds to a pot or seed module and keep moist without soaking them.
Once they have true leaves they can move to a pot from the seed module, but keep them indoors until after all danger of frost has passed, and harden them off before planting out in big pots, in a grow bag, or if your garden is very sheltered, a sunny patch of open ground. Aubergine plants like reasonably high humidity, so the plants can be sprayed with a mister regularly to keep moisture levels up.
This is another plant that likes to be well watered when the fruits are forming in July and August. I also feed them at the same time as feeding the tomatoes. Here, being forced to use a watering can could be a good thing. Aubergines are so leafy that a lot of water just runs off the leaves on to the ground if sprayed with a hose.
The fruits should be ready to harvest in September and October. Make sure you’ve picked them all before the first frost, which will kill off the plant.

Courgettes
Courgette Romanesco ripening in the sun.

It seems perverse to talk about courgettes as a Mediterranean vegetable and not pumpkins and squash, but while there are lots of recognisably Med things to do with courgettes, pumpkins seem to belong to a more northern European and American tradition.
Courgettes, however, go in ratatouille, or are simply stewed with tomatoes, or best of all, the flowers are stuffed and then deep-fried, which always seems to me to be a very luxurious dish even though it’s almost a free by-product of the plant. 
Courgettes are fast growers. You don’t need to think about sowing them until April, and since the plants and fruit won’t really grow until it’s properly warm you won’t gain much by sowing earlier. I have tried growing them early under a cloche, but the fruit was very small and had a tendency to shrivel before it matured. 
Courgettes have big seeds and would outgrow a seed module very quickly, so start them off indoors in 3 inch pots.
Nearly all gardening books and experts say you must sow them on edge, or on their side, to reduce the chance of the seeds rotting. I’ve never had any problems with germination or rotting, despite being lazy and simply laying the seeds on the soil. However, in the interest of accuracy what it means is pushing the seeds into the soil vertically, pointed end first.
Sow two seeds to a pot, and remove the weaker seedling once they’ve germinated and produced true leaves. Incidentally, whenever you remove the weaker seedling, don’t yank it out. You may damage the root structure of the other, stronger seedling. I snip out the seedling to be thinned, at soil level, with a pair of manicure scissors. 
Courgettes – and squash – are greedy plants. They like lots and lots of feeding. Many books suggest growing them on the compost heap with good reason. If the top of your compost heap looks at all plantable (rather than being a pile of eggshells, avocado skins and teabags), this is an excellent space-saving idea. Transfer them to the compost heap, or open ground, once any danger of frost is over and the nights are no longer cold. You might want to give the plants a little slug protection: put a copper collar round the plants or scatter a few slug pellets.
You can pick the male flowers to stuff and eat. Pick the fruits when they’re small. Leaving them to grow into marrows will stop the plant producing any other courgettes, so only let them grow on into marrows if you really want marrows.
At the height of summer you’ll find you have a glut of courgettes. Don’t despair: grated courgettes can ‘disappear’ into casseroles, spaghetti bolognaise, soups, and they also make lovely fritters. There is a recipe for a chocolate cake here on my Gourmet Gardening blog which incorporates two grated courgettes - the same principle as the carrots in carrot cake.

Herbs
Many Mediterranean dishes are unthinkable without the accompanying herbs to flavour them. Basil, rosemary, thyme, oregano and bay are all herbs we associate with the warmth and sunshine of the Med.
Herbs are probably the easiest of plants to raise, especially if you don’t have much space. They will do well in pots or even a window box on the balcony.
Rosemary, thyme and oregano are similar in that in the wild they flourish in poor, even stony, soil. So don’t treat them too kindly. They will survive cold, but not prolonged wet.
Basil, on the other hand is much leafier, and likes a rich, moist soil. I prefer to grow basil indoors where it can be cossetted and produce lush emerald green leaves.
There's more on Mediterranean herbs and herbs in general elsewhere on the Secret Garden blog.


Tuesday, 20 March 2012

Smoked out

The Secret Garden Club held its second smoking workshop on Sunday March 18: the notes that follow reflect the activities of the day and vary slightly from the blog post following the first smoking day in November 2011.


Smoking is a technique which imparts a distinctive flavour to food and can also change its texture slightly. Our ancestors smoked food for its preservative effect, and while food which has been smoked will take longer to go off, these days, it is for the smoke flavour plus any aromatics that may have been added to the smoke mix, that makes the food so delicious.


We looked at three different methods of smoking food during the afternoon. Tea-smoking uses a mix of sugar, rice and tea leaves which are heated until they smoulder to produce a fragrant smoke which both cooks and flavours food.


Hot-smoking over wood applies heat to wood chips in order to cook food and to flavour it more strongly. Cold smoking involves exposing food to cool smoke for a much longer period of time, from several hours to a couple of days and will both flavour and preserve food without cooking it.


Tea-smoking uses a mix of tea leaves, brown sugar, raw rice and optional aromatics as the smoking medium. With the mix set in a pan under a steamer, the smoke generated infuses foods in the steamer basket with a delicate, elusive tea-smoke flavour.

Secret Garden Club tea-smoking mix:

Half a (US) cup of tea leaves (about 4 tbsp)
Half a (US) cup of brown sugar (about 4 tbsp)
Half a (US) cup of raw long-grain rice (about tbsp)


Mix the ingredients together, then make a foil saucer that fits into the bottom of the base pan. Pour the smoking mixture on to the foil (this is to protect the pan itself from staining), set it over the heat and fit the steamer basket and lid.


The trout fillets were laid on the steamer basket just as the smoke began to curl upwards through the slats, and steamed for around 20 minutes. Times will vary and our fillets were quite chunky. With fish, remove from the smoker as soon as they are opaque all the way through so that they don't overcook. With tea-smoking, less is definitely more: over-smoke the food and you'll be left with a distinct aftertaste of fag packet.

Hot-smoking over wood applies direct heat to soaked woodchips so that they smoulder gently. The wood and the food are both in a sealed unit so that the heat and smoke permeate the food to cook and smoke it at the same time. You can use the same equipment as for tea-smoking, above, ideally on an outdoor cooker. The process will produce much more smoke than with tea-smoking, so if you do have to hot smoke over wood indoors, open all windows and doors first and turn up your extractor fan - although you will probably set off your smoke alarm even so.   

Important: when smoking food with any kind of wood, it is vitally important that the wood is raw, and untreated. Any sort of treatment, coating, glue or varnish will give off potentially toxic fumes when smoked - NOT what you want coating your food. If the wood you want to use has been cut with a chainsaw, beware - there could easily be oil residues on the wood from the chainsaw. It's highly satisfying to use wood that you have chopped or sourced yourself, but you must be 100% certain that the wood is free of any chemicals. 


We used a proprietary hot-smoker - very similar to this one - set up outside on the terrace. 

  • Sweet peppers, sliced in half and with seeds removed;
  • Lemons, cut in half;
  • Tofu, cut into thick slices and marinaded for two hours beforehand in soy sauce and maple syrup;
  • Sweetcorn, on the cob;
  • Halloumi cheese
These were all smoked over hickory chips for 25-30 minutes. It's well worth experimenting with different types of wood, so long as you stick to hardwoods. We were asked on Sunday about smoking with pine to get that distinctive resinated flavour. But pine, and also cedar, contain too much in the way of tars and resins to smoke successfully and can even ruin your smoker. Fruit woods, such as pear, apple, or cherry, are all popularly used for smoking. Oak, beech and hickory are also classic smoking woods.

Marinade for tofu
3 tbsp soy sauce
3 tbsp maple syrup
2 tsps olive oil

Half a teasp of English mustard 

Whisk all ingredients well together. This was also used to glaze the sweetcorn immediately prior to smoking.

Cold-smoking is the technique we associate most with fish (smoked salmon, smoked mackerel, smoked haddock) and meat (smoked bacon). However, it's also used to smoke cheese (such as applewood-smoked cheddar) and bulbs of garlic. When you expose food to cold, or cool, smoke, the food does not cook, although the smoke will penetrate the food more thoroughly than when hot-smoked. 

Fish (and meat) will need to be salted, or brined, before it is cold-smoked. To salt, say, a side of salmon, find a baking tray on which the salmon will fit  comfortably. Spread a layer of rock salt on the base of the tray.  Lay the salmon, skin side down on the rock salt, and cover completely with more salt. Other aromatics can be added as well: lemon slices, herbs, beetroot, some gin or vidka maybe. Now place a second baking tray on top of the salmon and salt, and weight it down by placing tins or full jars on the top. Slide the whole lot into the fridge and leave for 12-24 hours. 

Remove the salmon, reserving the salt mixture and drain away any liquid generated during this first salting. Turn the fish over on the rock salt base, so that it's now skin side up. Cover again with salt and aromatics (you may need more). Weight down again as before. Put the tray and salmon combo back in the fridge for another 12-24 hours.

Brining it creates a sweeter cure: make up a salt/sugar solution in cold water, completely immerse the fish in this and store, covered, in the fridge for around 8-12 hours. (Smaller fillets may take less time.)

Simple brine
100g brown sugar
75g salt
1 litre water

Plenty of other flavours can be added to this, eg, fennel, onions, garlic, herbs. Or go Asian with star anise, cinnamon, lemongrass or lime.

Once salted/brined, rinse the fish well to get rid of excess salt, then dry it, ideally for a couple of hours or so, in a cool, well-ventilated place. Only then it is ready to smoke. We also smoked Camembert cheese, salt, aubergines and garlic bulbs – these do not need brining or curing but can go straight into the cold smoker.

With cold-smoking, the challenge is to generate smoke that is cool when it reaches your food. The ideal temperature range in the smoker is between 26 and 30 degrees Celsius (80-90 degrees Fahrenheit). If the temperature exceeds 37 degrees C (100 F), then the fish will get too warm. It will lose moisture and may start to cook.

An obvious way to do this is to burn your wood in one place, channel the smoke through piping so that it cools as it goes, and direct it into a smokehouse. But if you just want to try out some cold-smoking, this is quite a cumbersome operation. Remember also, your fire needs to burn wood only (see warnings about wood-burning, above), and your piping and smokehouse should be lined with non-reactive material.

A second solution is to generate the smoke from as small a heat source as possible. We used a ProQ smoke generator, available online from Mac's BBQ, and Amazon among other places, placed in the bottom of an ordinary kettle barbecue. If you don't have a deep barbecue, you could try making a smokehouse out of an old fridge, or a discarded filing cabinet (popular because the file rods are handy to hang fish fillets from), or even a cardboard box (while the smoke should be cool when it reaches the box, place the smoke generator itself on foil or something non-reactive and fireproof).

The ProQ is filled with smoke dust in a spiral pattern. The outer ring of the spiral is heated by a  small tealight which can then be removed when the wood dust starts to smoulder. It will continue to smoulder for up to ten hours. It's an effective, tidy way to generate cool smoke, although we found that it didn't always produce very much smoke. Two ProQ smoke generators would probably be ideal, but expensive.


If you don't want to shell out for commercial kit straightaway, try the tin + soldering iron method instead. For this you need a deep container, again such as a kettle barbecue, a soldering iron, an empty 400g food tin, and your woodchips. For this method you'll also need access to a power supply.


Important: the soldering iron must have no solder on it AT ALL. You do not want smouldering lead contaminating your woodsmoke. Ideally, buy a new soldering iron for about a tenner and use it exclusively for cold-smoking.
Also note: many food tins these days, especially supermarket own-brand cans, are lined with a plastic coating. You should use an unlined tin - Baxter's soup cans are unlined, for example.

Before you empty the contents of the tin, make a hole in it at the top end (we used a sharpening steel and a hammer), opposite the ring-pull if there is one. The hole needs to be just big enough to fit the tip and arm of the soldering iron. This is much easier to do when the tin is full; the lid tends to buckle and collapse if you empty the contents first. Wash out the tin, and let it dry.

Using the ring-pull, carefully peel back the lid of the tin about half way. Fill just over half the tin with your wood chips. Close the lid as far as possible, then push the soldering iron through the hole so that it’s fully inserted in the tin and the arm is in direct contact with the woodchips. 

Put the tin with the soldering iron inserted in the bottom of the barbecue. Lay the food to be smoked on silver foil on the top rack. Carefull trail the soldering iron's cable out of the barbecue and plug into the power supply. Place the lid on the barbecue as tightly as possible allowing for the fact that the soldering iron cable will prevent it from closing fully. Switch on the power to the extension cable. You should start to see wisps of smoke emerge from under the lid within 5 mins.


With the soldering iron and tin at the bottom of the barbecue and the food laid out at the top, the smoke around the food should stay cool enough to cold smoke properly. If you have an outdoor thermometer, it's a good idea to place it on the rack next to the food, so that you can check the temperature regularly. On a sunny day, the outside temperature may heat up the interior of the barbecue. If you do see the temperature rising much above 30 degrees, slide a bag of ice into the bottom of the barbecue next to the tin of woodchips. This should bring the temperature down to the safe range and keep it there.


While the woodchip tin is smoking, prepare a second one. The tins will last about 90 mins to 2 hours, so, when the first is exhausted, unplug the soldering iron, remove it and the tin from the barbecue, and switch the soldering iron from tin 1 to tin 2. Tin 1 can now be emptied and reused.

Smoking workshop March 2012
Menu

Rum punch with smoked lemons

Smoked trout salad
Halloumi salad with tomatoes
Smoked marinaded tofu
Smoked red peppers
Smoked sweetcorn
Smoked aubergine curry
Selection of smoked cheeses


Friday, 16 March 2012

Take up smoking - again!


Sunday’s Secret Garden Club afternoon sees us return to the subject of smoking. Adding smoke to food gives it a delicious flavour and aroma, redolent of barbecues and the great outdoors. It doesn’t need specialist equipment: if you barbecue, you can smoke.
 

We’ll look at three different ways to smoke food  - from delicate tea-smoked fish, to a range of vegetables hot-smoked over wood chips, to cold smoking and how to rig up a cold smoker in your own back garden for a very small outlay.
  
MsMarmiteLover has promised to mix her acclaimed smoked lemon cocktails again to kick-start the afternoon, and we’ll finish with an afternoon tea inspired by our smoky ventures.

There will be plenty of time to chat and discuss the best way to set up a smoker and various techniques and foods to try.
Some of the food we’ll be smoking include:


  • Aubergines – hot-smoked for a distinctive char-grilled flavour;
  • Cheese – different varieties can be smoked with some very distinctive effects;
  • Garlic –smoked garlic can be used in place of ordinary cloves to add smoky notes;
  • Jalapeno chillies – smoked and dried chillies are known as chipotles and are used in Mexican cuisine;
  • Lemons – you haven’t lived until you’ve tried one of MsMarmiteLover’s smoked lemon cocktails;
  • Peppers – smoking brings out their sweetness;
  • Salmon – once you’ve tried your own home-cured, home-smoked salmon, you’ll never want shop-bought again;
  • Salt - gourmet seasoning;
  • Sweetcorn – marinaded and hot-smoked for a barbecue style dish;
  • Tofu – marinaded first for sweetness and to retain its softness, then hot-smoked ;
  • Tomatoes – tea-smoked to bring out their essential flavours;
  • Trout fillets – smoked over leaves of Lapsang Souchong tea for a delicate, elusive taste.

 Join us on Sunday March 18th, starting at 2.00pm. Booking details are here.

Monday, 21 November 2011

Learn to smoke

The Secret Garden Club returned on November 20 with a session on techniques for smoking food. Taking in tea-smoking, hot-smoking and cold-smoking, Zia Mays explained the principles of each method, using a wide variety of ingredients, while MsMarmiteLover turned the smoked foods into a delicious smoky-themed tea for everyone.


Guests were welcomed with a vodka and smoked lemonade cocktail, before the fires were lit in earnest and smoke wafted into the air.


Smoking techniques
Tea-smoking is a method of hot-smoking, ie, the food is cooked at the same time as being smoked. It uses a mix of tea leaves, brown sugar, raw rice and optional aromatics as the smoking medium. With the mix set in a pan under a steamer, the smoke generated infuses foods in the steamer basket with a delicate, elusive tea-smoke flavour.


Secret Garden Club tea-smoking mix:
Half a (US) cup of Lapsang Souchong tea leaves (about 30g)
Half a (US) cup of brown sugar (about 75g)
Half a (US) cup of raw long-grain rice (about 75g)
This was used to smoke:
Trout fillets - marinaded for one hour beforehand in whisky;
Tomatoes - cut in half hemispherically and lightly roasted in the oven for 20 minutes before smoking.


Also good with chicken - use thin fillets to ensure they are cooked through, duck, quail. With tea-smoking, less is definitely more: over-smoke the food and you'll be left with a distinct aftertaste of fag packet.


Hot-smoking over wood applies direct heat to soaked woodchips so that they smoulder gently. The wood and the food are both in a sealed unit so that the heat and smoke permeate the food to cook and smoke it at the same time.


Important: when smoking food with any kind of wood, it is vitally important that the wood is raw, and untreated. Any sort of treatment, coating, glue or varnish will give off potentially toxic fumes when smoked - NOT what you want coating your food. If the wood you want to use has been cut with a chainsaw, beware - there could easily be oil residues on the wood from the chainsaw. It's highly satisfying to use wood that you have chopped or sourced yourself, but you must be 100% certain that the wood is free of any chemicals. 


We smoked vegetables in the hot-smoker:
  • Sweet peppers;
  • Pumpkins, cut into thin wedges and marinaded for two hours beforehand in a mix of soy sauce and maple syrup;
  • Chillies;
  • Tofu, cut into thick slices and marinaded for two hours beforehand.
  • Sweetcorn, on the cob;
  • Apples, following a baked apple recipe but with added smokiness.
Basic marinade for the tofu, pumpkins:
3 tbsp soy sauce
3 tbsp maple syrup
A dash of sesame oil
A dash of olive oil
Half a teasp of English mustard powder


The sweetcorn and baked apples were particularly successful. We've had variable results with tofu: firstly, try to get firm tofu so that it doesn't disintegrate when you try to handle it. Tofu definitely needs to be marinaded first for a good two hours - and a more Japanese style marinade with mirin and wasabi would also work well here.


Cold-smoking is the technique we associate most with fish - think smoked salmon, smoked mackerel, smoked haddock - and meat - smoked bacon. However, it's also used to smoke cheese (such as applewood-smoked cheddar) and bulbs of garlic. When you expose food to cold, or cool, smoke, the food does not cook, although the smoke will penetrate the food more thoroughly than when hot-smoked. 

Fish (and meat) will need to be salted, or brined, before it is cold-smoked. To salt, say, a side of salmon, cover completely in salt and keep it, weighted down, in the fridge for around 18-24 hours. Brining it creates a sweeter cure: make up a salt/sugar solution, completely immerse the fish in this and store, covered, in the fridge for around eight hours. (Smaller fillets may take less time.)

Simple brine
100g brown sugar
75g salt
1 litre water

Plenty of other flavours can be added to this, eg, fennel, onions, garlic, herbs.

Reasons for brining:
·         The salt and/or sugar in the brine help the preserving process;
·         Salting/brining inhibits bacteria which might otherwise multiply while the fish is being smoked;
·         Both salt and sugar add flavour to the fish;

Once salted/brined, rinse the fish well to get rid of excess salt, then dry it, ideally for a couple of hours or so, in a cool, well-ventilated place. Only then it is ready to smoke. We also smoked cheddar cheese and garlic bulbs – these do not need brining or curing but can go straight into the cold smoker.

With cold-smoking, the challenge is to generate smoke that is cool when it reaches your food. The ideal temperature range in the smoker is between 26 and 30 degrees Celsius (80-90 degrees Fahrenheit). If the temperature exceeds 37 degrees C (100 F), then the fish will get too warm. It will lose moisture and may start to cook.

An obvious way to do this is to burn your wood in one place, channel the smoke through piping so that it cools as it goes, and direct it into a smokehouse. But if you just want to try out some cold-smoking, this is quite a cumbersome operation. Remember also, your fire needs to burn wood only (see warnings about wood-burning, above), and your piping and smokehouse should be lined with non-reactive material.

Costs can be kept down by making your smokehouse from household items such as an old fridge (cut a hole in one side to take the piped smoke, or a filing cabinet (popular because the file rods are handy to hang fish fillets from), or even a cardboard box (remember, the smoke is cool when it reaches the box).

We demonstrated a method which is quick to set up, and uses everyday items so is handy for anyone who wants to experiment but isn’t sure that they want to spend time constructing a semi-permanent smokehouse. In this option, we use the smallest possible heat point to generate a comparatively large amount of smoke.

You will need:
A deep-based, or kettle barbecue, such as a Weber
A soldering iron
A tin can, eg a Baxters soup tin
Woodchips (see notes, on sourcing wood, above)
Silver foil
A standard outdoor thermometer (recommended)
A bag of ice (may not be necessary but have one on standby)
A power extension cable

Note: the soldering iron must have no solder on it AT ALL. This is your heat source and smoking lead is a very bad idea indeed. Best to buy a new soldering iron for about a tenner and use it exclusively for cold-smoking.
Many tins these days, especially supermarket own-brand cans, are lined. You should use an unlined tin. We haven’t researched exhaustively for suitable brands, but Baxters’ soup tins are unlined, and the soup’s OK as well.

While the tin is still full, make a hole in it at the end (we used a sharpening steel and a hammer), opposite the ring-pull if there is one. The hole needs to be just big enough to fit the tip and arm of the soldering iron. Empty and wash out the tin, and let it dry.

Carefully peel back the lid of the tin using the ring-pull about half way. Fill just over half the tin with your wood chips. Close the lid as far as possible, then push the soldering iron through the hole so that it’s fully inserted in the tin and the arm is in direct contact with the woodchips. This is your ‘firepit’.

Put the tin in the bottom of the barbecue. Lay the food to be smoked on the silver foil on the top rack. Gently ease the soldering iron cable out of the barbecue and plug into the extension socket. Place the lid on the barbecue as tightly as possible allowing for the fact that the soldering iron cable will prevent it from closing fully. Switch on the power to the extension cable. You should start to see wisps of smoke emerge from under the lid within 5 mins.

With tin, soldering iron and food positioned this way, the smoke around the food should stay cool enough to cold smoke properly. We recommend you place a thermometer on the rack next to the food and check the temperature regularly. On a sunny day, the outside temperature may make the barbecue heat up – and it’s not something to do in midsummer. Cold smoking this way is a wintertime occupation. If you do see the temperature rising much above 30 degrees, slide a bag of ice into the bottom of the barbecue. This should bring the temperature down to the safe range and keep it there.

While the woodchip tin is smoking, prepare a second one. The tins will last about 90 mins to 2 hours, so, when the first is exhausted, unplug the soldering iron, remove it and the tin from the barbecue, and switch the soldering iron from tin 1 to tin 2. Tin 1 can now be emptied and reused.

Timings
Cheddar cheese
Lightly smoked: 3 hours
Medium smoked: 6 hours

Garlic bulbs
Light to medium smoked: 6 hours

Salmon fillets
Lightly smoked: 12 hours


Secret Garden Club Smoking Workshop
Menu

Vodka and smoked lemonade cocktail

Tea-smoked trout and tomato, watercress salad
Smoked cheese and garlic toasted sandwiches
Smoked salmon with cucumber pickles

Marinaded smoked pumpkin slices
Marinaded smoked tofu
Smoked sweet peppers and hot chillies
Smoked glazed sweetcorn

Smoked baked apples with Jameson whisky