
If you have no space to grow anything else, you can surely
squeeze a pot of herbs in somewhere – a patio, a balcony, the front doorstep, a
windowsill? Growing your own fresh herbs will give you the option to enhance
the flavour of dishes and add your own twist to them. Their fragrance is often
uplifting, too and frankly, I always enjoy being hedonistically extravagant
with them – cutting and chopping loads to stir into a dish or to make a
mountain of pesto, safe in the knowledge that they will regrow.
Many of the visitors to the Secret Garden Club grow plants
in very little space, so on Sunday we looked at a number of space-saving
techniques for herbs.
Most herbs will grow very happily in pots. Some like
particular conditions – salad burnet, for example, is happiest in a chalky
meadow, while parsley always does well in sandy soil and thyme and oregano will
appreciate being treated mean and kept in poor soil. By growing in pots you can
give your herbs the soil they like the best.
Some will grow happily from seed: basil, for instance can be
sown quite densely on a surface of seed compost in a pot, very thinly covered
with more compost and left somewhere sunny to germinate within a few days. Let
it grow 2-3 sets of true leaves before you starting cutting and you should be
harvesting basil all summer long. The same goes for parsley, both curly-leaved
and flat-leaved, although it will take longer to germinate.
Others are better bought as small plants and grown on during
spring and summer: rosemary, thyme and sage for example. With care, they last
over the winter and on into the following year – and the year after that.
Rosemary and thyme are hardier than they look and will withstand some frost and
snow – it’s getting wet and waterlogged that they don’t like.
Coriander is another herb which will germinate very readily,
but coriander also has a tendency, I find, to bolt. That is, instead of
producing lots of lovely lush leaves, it will quickly send up a thick central
stalk and flower even while the leaves are still sparse and spindly. The best
thing to do with coriander that does this, is to leave it until the flowers are
over and they will set seed, which you can collect and use to flavour food and
of course as a component in spice mix. Don’t forget also that the stems and
roots of coriander are full of flavour and good to use in the kitchen.
But how to ensure a supply of coriander leaf? We grow
coriander as microleaves at the Secret Garden Club: these are leaves harvested
when the plant is still very young but still full of that distinctive coriander
flavour.
To grow microleaf coriander, select a shallow container such
as a seed tray or a length of half-guttering, or (a Secret Garden favourite) an
old wooden greengrocer’s crate. The reason you want a shallow container is that
your plants won’t be around long enough to put down deep roots so you can use
much less compost – it’s an economical way to grow as well.
Make sure the container has drainage holes in the bottom
(you can get away without drainage holes in half-guttering if you leave the
sides free to drain away any excess water), and fill to about 2cm below the rim
with seed compost. Firm the surface lightly, and water it well.
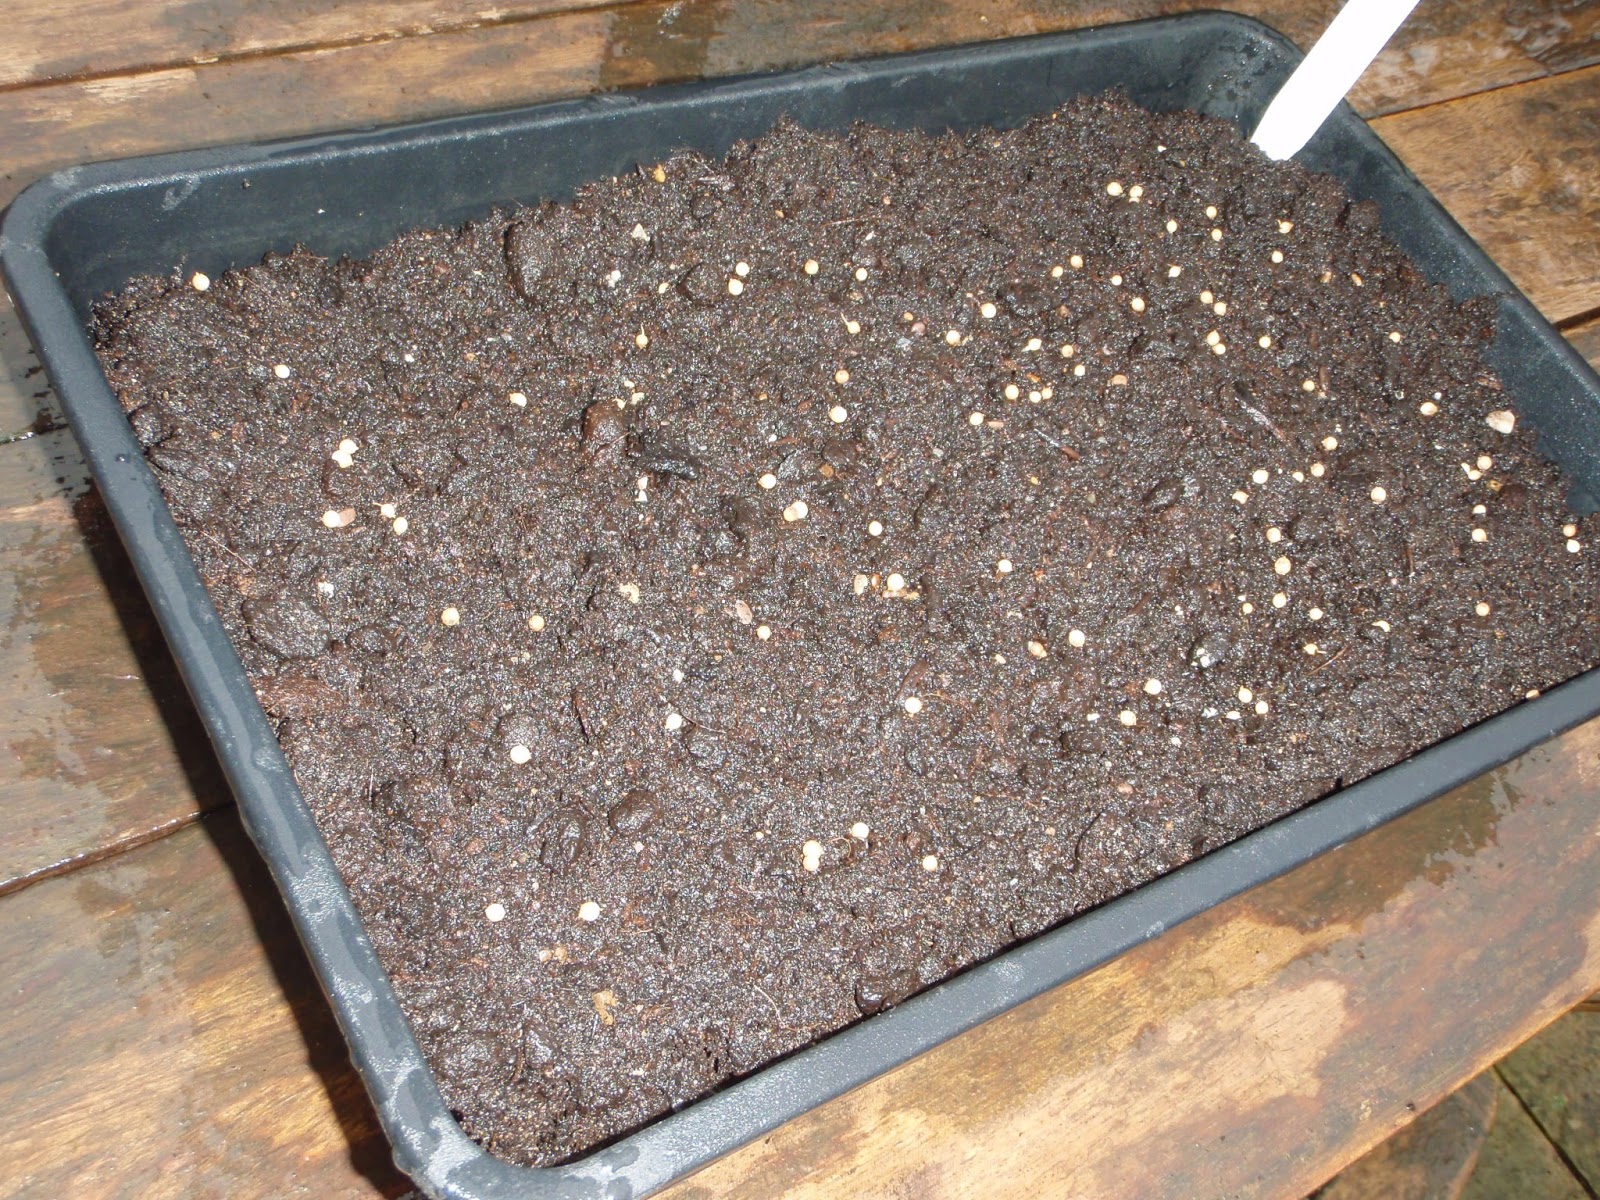
Sprinkle coriander seed liberally over the surface. You
don’t need to space the seeds out as you’re not trying to rear fully-grown
plants. But keep the seeds to a single layer in the tray. The seeds you buy in
the Asian supermarket will germinate perfectly readily and will be cheaper than
horticultural seeds. (I would however, always recommend buying seeds from a
nursery if you’re growing plants to maturity or to save your own seed.)
Cover lightly with compost. A rule of thumb with seeds – and
in the absence of any other instructions – is to cover them with a thickness of
compost equal to the diameter of the seed itself. So, tiny seeds like basil and
parsley can be barely covered – in fact, parsley seed doesn’t really need
covering at all – while bigger seeds like peas, beans or squash need to be
buried more deeply in the soil.
At this time of year, I would cover the seed tray either
with a clear plastic lid which fits over the top, or with a clear – and clean –
polythene bag secured to the tray with a rubber band. This will warm up the
soil and protect from draughts.
Place the covered seed tray somewhere light and bright, like
a windowsill. After April or thereabouts, it could go outside. In winter, it
should stay indoors.
You should see seeds beginning to sprout within a week. Once
they’ve produced the first leaves, you can remove the cover and water them very
gently. Use a mister if possible else you are likely to flatten the seedlings.
Let the seedlings grow until they are an inch or two high by
which time they will have a couple of pairs of true leaves. Snip the leaves off
with scissors to use in your cooking and don’t expect any regrowth. Once you’re
halfway through this first tray it’s time to start the next one.
I’ve gone into such detail about growing coriander as
microleaves because the same technique can be applied to many herbs and salad
plants: basil, parsley (although parsley is a longer lasting plant when fully
grown so the benefits of harvesting very young aren’t so marked), and chervil,
for instance.
 |
| Microleaves, from top left to right: purple radish, red amaranth, garlic chives Bottom row, left to right: shiso, rocket, watercress Microleaves kindly supplied by Wow! Micro Leaf. |
At the Secret Garden Club on Sunday we also showed samples
of red amaranth, purple radish, pea shoots, rocket, garlic chives and shiso (or
perilla), all grown as microleaves, and kindly supplied to us by Wow! Micro Leaf. These give salad a distinctive taste and
the intensity of flavour, given the size of leaves, is surprising. Well worth
trying.
The vertical garden
The ultimate space-saver, though, has got to be the Secret
Garden Club’s own take on the vertical garden. Vertical gardens are all the
rage at the big flower shows – remember the B&Q sponsored one at the
Chelsea Flower show in 2011? They can be very expensive to set up and
difficult to maintain.
Not so the Secret Garden Club’s vertical garden, which is
easy to assemble on a domestic scale, needs just a little watering and will give
you a season’s worth of various herbs.
All you need is:
- An ‘over-the-door’ storage hanger with pockets – this (pictured) is the one we used, for example.

- A selection of small potted plants – typically the small herb pots you find in garden centres for 99p, or £1.49. We used rosemary, thyme, basil, parsley, oregano, feverfew and lavender.
- At least one larger plant, eg, the lavender, is desirable to give your vertical garden some ballast.
- Some extra compost.
Hang your storage hanger up using the hooks provided. Start
at the bottom with your larger plant. Remove carefully from its pot and site it
inside one of the bottom pockets.
This will give your vertical garden some weight at the
bottom while your plant it up and stabilise it.
For the narrower deep pockets at the top, fill about a third
of the pockets with compost, before adding plants from your pots, else they
will sink too deeply into the pockets and disappear from view. Add a plant to
each pocket, tucking each one in neatly.
Note: you can also buy similar storage hangers to these
which are made of plasticised material. These are fine to use, but take a
skewer and stab some drainage holes in each pocket before you water. Otherwise
your herbs will get waterlogged.
 |
| The hanging garden, planted up. Top row: thyme and oregano Second row: thyme, feverfew, oregano, parsley Third row: coriander. Bottom row: rosemary Throughout the coming season, the plants will grow and overflow the pockets to create a vertical garden effect. |
When your storage hanger is filled, water each plant well
and leave to drain before you select the best place to keep your vertical
garden. Your plants will need somewhere light, so hanging from a window facing into the room isn’t ideal. If you can
hang over the back door facing outside, that might well be ideal.
Your vertical hanging garden should give you a steady supply of
herbs for the rest of the season.
Notes on growing and using herbs
- If your herbs are outside, plant them as close to your back door or kitchen door as possible. You may think you’ll happily go all the way down the garden to pick herbs, but when it’s cold and wet you’ll want them as close at hand as possible.
- Most herbs like the sun and will do best planted in a sunny site. Notable exceptions are parsley and chervil, which are happy in partial shade.
- No herbs like the wind, though. Perhaps the most important thing to consider about the planting position is that it should be sheltered. Construct a windbreak if necessary.
- Don’t water them excessively. More herbs are killed off by waterlogging than drying out. Herbs like thyme and rosemary will appreciate a bit of drought. (Think of those dry Mediterranean hillsides.)
- If you buy herbs in those very tiny garden centre pot, transplant them to the open ground or a bigger pot of trough once you get them home. They will outgrow the small pots very quickly.
- Don’t cut all the leaves off a plant in one go. You’ll kill it off. Always leave enough so that the plant can regrow.
- If your herbs do bolt and flower early, don’t despair. Many herb flowers are edible as well as the leaves – see our post on edible flowers for a checklist.
This is great information, thanks’ for share!
ReplyDeletethings can make a big difference in organization and help save space.
ReplyDelete